Poetry Memorization–The Value and a Review

Disclaimer: Institute for Excellence in Writing sent my family their program Linguistic Development through Poetry Memorization in exchange for this fair review. We also received the physical version of the Student Book. (The set comes with the pdf version of the book; the physical is an extra purchase.) Clear? Groovy.

My kids have been studying poetry for as long as they could talk…longer even. I would read poetry to them when they were tiny little nubbins. They could “recite” poetry before they could pronounce their Rs and Ls. One of our daughters is a very talented poet. Poetry is a pretty big deal here.

Memorization is equally as important. Fill them with good things, and good things will flow out. (That’s a paraphrase from the Bible, but God said it a lot better than I did. Obviously, I’m not a poet.) For years Fridays (and now Saturdays) were reserved for recitations–good times!

That used to be a common practice in schools across the country, but not anymore. Memorization fell out of practice around the 1950s, being touted as a nail in the coffin of creativity. Au contraire! (That’s French for wrong-o!) The fact of the matter is that one way children learn the beauty of language and how to use it is through listening, repetition, and imitation, all of which are part of memorization.

Linguistic Development through Poetry Memorization (heretofore known as This Course) capitalizes on the value of poetry and memorization to not only fill students with good things, but to improve their speaking ability, comprehension, vocabulary, overall language usage, and, dare I say, writing.

Linguistic Development through Poetry Memorization IEW Review

What’s in it?

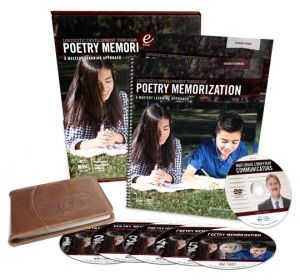
This Course comes with a five-disc CD series of poems, a DVD entitled Nurturing Competent Communicators by Andrew Pudewa, a teacher’s manual, a downloadable student text (pdf) containing all the poems, and seven downloadable workshops (audio mp3s) for the parent/instructor. The student text is also available as a physical book if you wanted to purchase that separately.

The DVD explains how you can influence your child’s language development on a daily basis. Your daily habits and natural language usage is huge for your children, and poetry memorization can enhance the experience enormously. Andrew Pudewa wins me over by stressing the importance of competence in writing–hello! Have I not been saying that?! My mom will tell you that I once turned down a man because the letters he sent were poorly written. I wish I could say she’s exaggerating.

Moving on.

Linguistic Development through Poetry Memorization IEW Review

The very most basic way I can explain how this programs works is this:

Your children listen to the poems read on the disc or you read them to or with your child several times throughout the day. Not all of them every day–stop choking on your latte. The process of hearing, seeing (if they’re readers), and repeating will cement the sound and flow of the language in their minds (and hearts–I love words!).

If you have small children, begin at the beginning. If you have older children, you can start at the beginning also, but IEW recommends you allow them to “get into it” by choosing a fun poem from the more advanced sections. There is a schedule for the older children that they can develop to keep track of which poems to review each day. It would be a shame ot forget them after building those neuro-connectors, wouldn’t it?

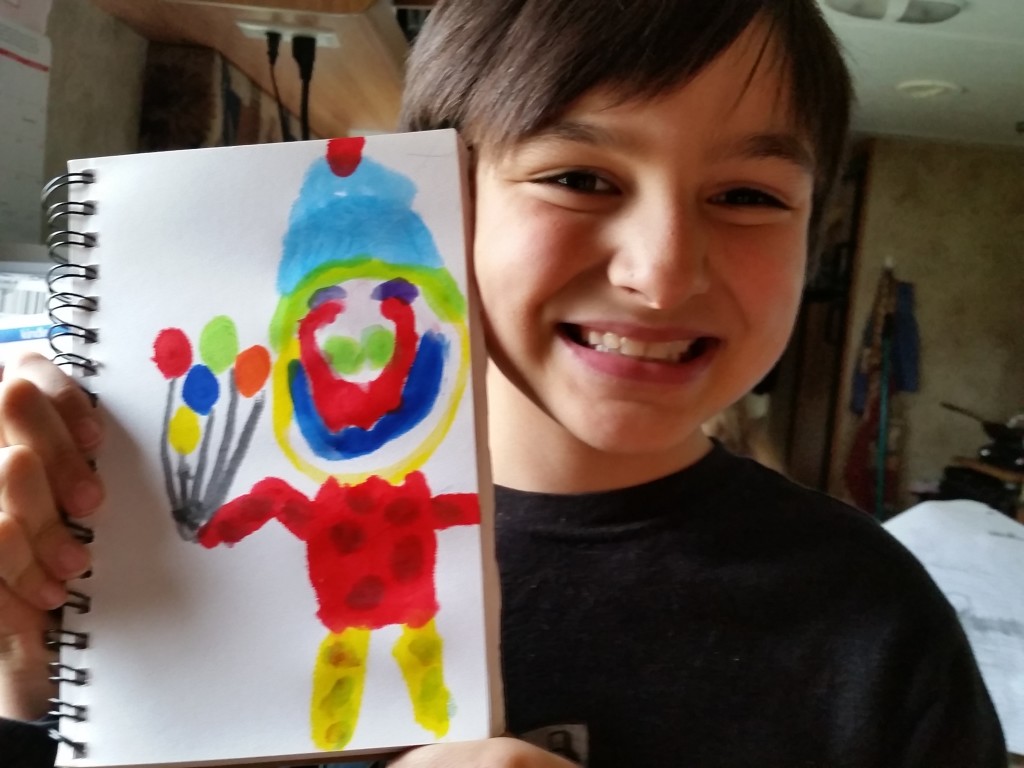
Over the course of the five levels, your children will be memorizing fun lilts, complex poetry, speeches, Shakespeare, and more. This Course will carry you throughout your child’s schooling years, and can be used for copywork and dictation (and even spelling, if you want). I also used it for a little creative writing, thanks to some suggestions from the teacher’s manual.

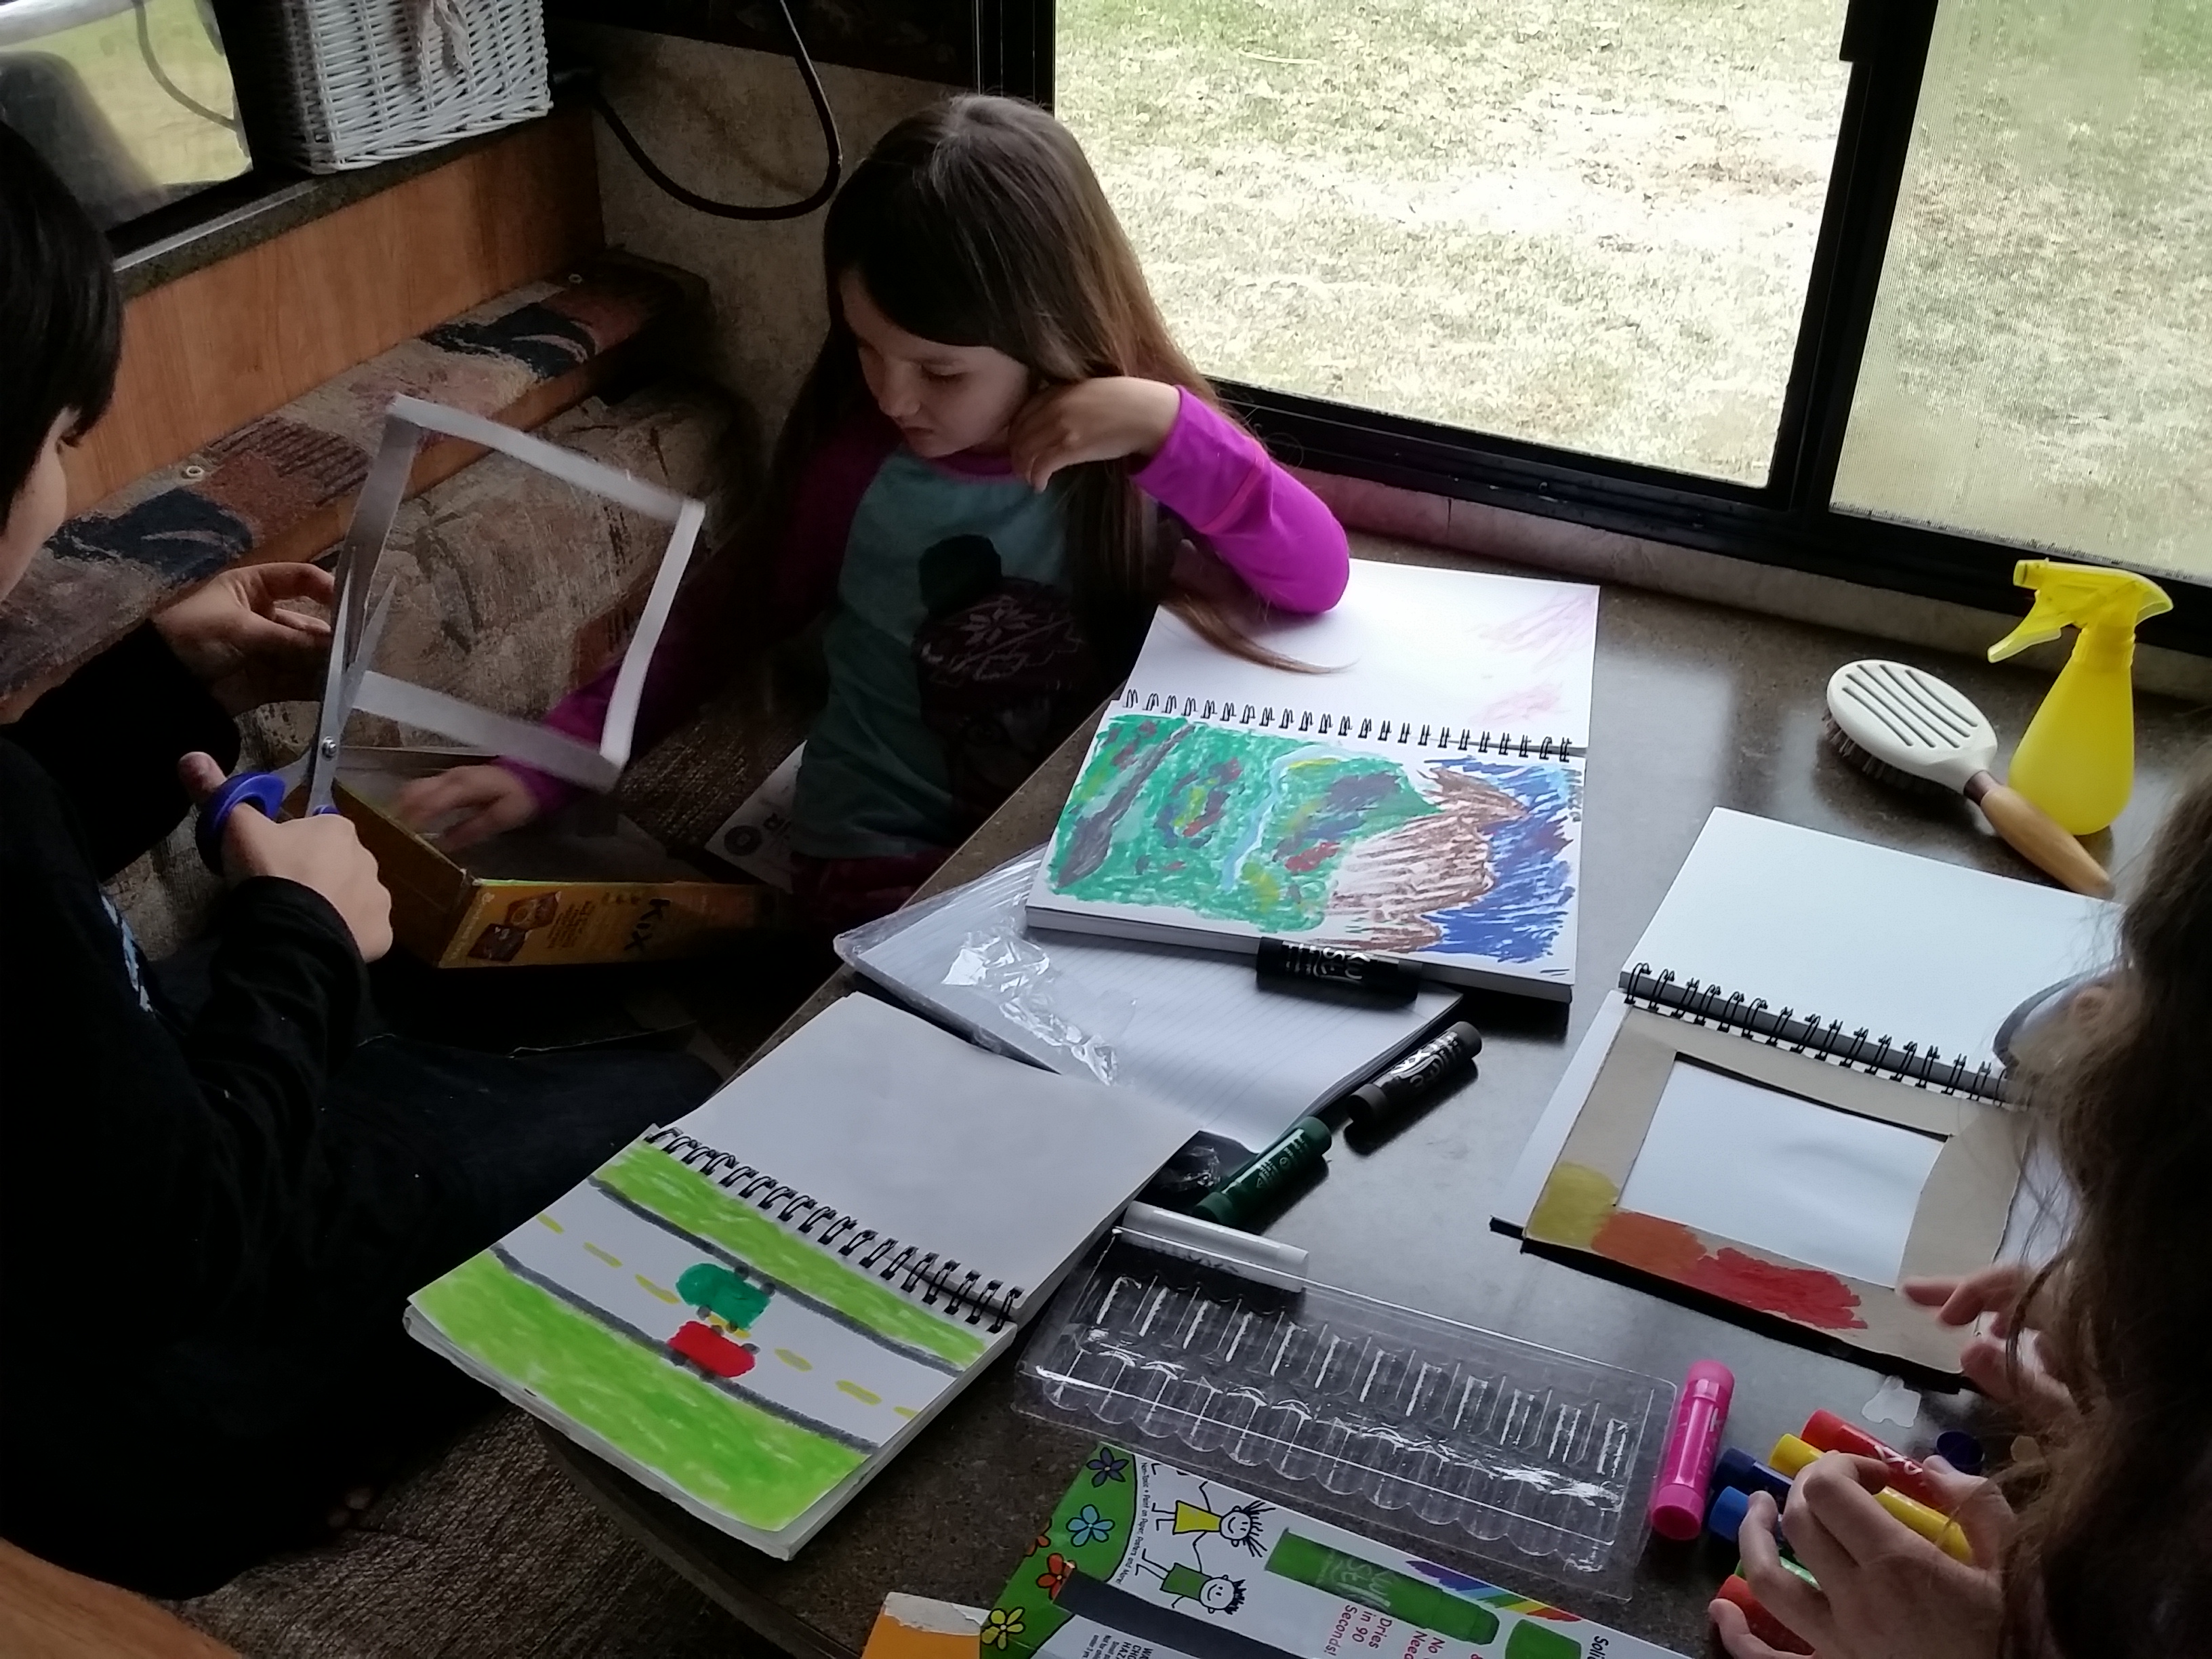
I like to listen to a poem together and have my child use that poem for copywork. I then like to display the copywork someplace prominent while the child is learning that poem. You could also photocopy it from the student book, which contains all the poems as well as some illustrations they could color. Having the poem, say, on the refrigerator or in the bathroom (although it’s only about two feet from our frig to the toidy) is a good way to keep it the forefront of our minds and keep Mama from forgetting to review it.

Because we have many different ages, we play the CD from the beginning, and then the littles are excused from participating when we get to the poems they haven’t begun yet. They, of course, stick around and learn faster than a person would expect. Kids surprise ya’ like that. As we get to the higher levels, and the kids are on different discs, we’ll have to break up into groups–it’s okay…we’ll survive!

A note for large families:

One thing about IEW that I really appreciate is that they allow you to photocopy pages from their student book for use within your own family. I always like it when the homeschool company gives a nod to the many single income, large families who homeschool. It makes me far more likely to purchase from them.

Having all five levels together also makes it more budget (and shelf space) friendly–you only buy once! Plus, since all the kids eventually go to the beginning (even if they started with a harder poem just to get them interested), they will all be reciting and practicing and reading and posting and copying poems as a constant review to the others. I love this real life review!

Warning:

Do not use this curriculum if you don’t appreciate your children bursting into sudden and seemingly random poetical recitations at the most unpredictable moments…especially when your walking in the woods and two roads diverge. Here’s a life hint–take the one less traveled; that will make all the difference.

Additional Thoughts for my Fellow Roadschoolers:

Space and durability: the teacher’s manual is thin, and the binding is a sturdy plastic-coated wire. The discs are enclosed in a slim, leather-like case that even this little fella didn’t destroy.

Institute of Excellence in Writing's Linguistic Development through Poetry Memorization--save the world, use this course.
The case is relatively drool proof–huge bonus for long driving days.

Internet: I will admit it was a juggling act to get the seven mp3s downloaded, but the course does not rely on them. If your internet connection ain’t what it could be wherever your home is parked at the moment, you can begin the course anyway and download the workshops next time you’re at the library or Starbucks. They are interesting and helpful, but you can proceed without them and listen at your downloadable leisure.

Find out what other homeshcoolers are saying by clicking here or on the banner below. I recommend the banner–it’s an easier shot.

Linguistic Development through Poetry Memorization IEW Review

Connect with IEW on social media:

disclaimer_zps7f3b646c

A High School Art Course

ARTistic Pursuits Inc. sent us a free copy of their ARTistic Pursuits High School Book One art curriculum in exchange for a fair review by me (the artistically disinclined), 17-year-old Marissa (who is beginning her art business), and our 15- and 13-year-old “twins,” Elisabeth and Emily (both more artistically talented than their mother). All opinions are ours…’kay? ‘Kay.

A Brief Overview of ARTistic Pursuits Inc.’s High School Book One art curriculum:

  • 16 units
  • 1 year
  • 2 lessons per week
  • 1(ish) hour per lesson

Was that brief enough for you?

ARTistic Pursuits Inc. Review

A slightly less brief discussion on what each unit entails:

  • Building a Visual Vocabulary: In plain English, the students will learn to “see” the unit’s main focus artistically out in the real world. My artistic daughter Marissa sees the world differently than I (the word girl) do. It’s fascinating to listen to her explain what she sees. It’s an entirely different way of viewing the world. This first lesson in each unit teaches your students to see like an artist…but only one topic at a time, so it’s manageable.
  • Art Appreciation and Art History: Here the student is still observing based on the unit’s topic, but this time they are studying the work of the masters. Ooooo…masters. This is a technique we’ve used in the past with our kids–always effective.
  • Techniques: Time to get busy busy busy. The students learn applied techniques. Fun!
  • Application: This is like the final exam, like the doctoral thesis, like the…well, like the project at the end of the unit.

Each of the four steps above includes an assignment which should take roughly an hour for your student to complete. (You can join in or fold laundry–your choice.)

ARTistic Pursuits--High School Art Curriuclum Review

Thoughts for the artistically inclined:

Marissa explained that the course has quite a few topics that she already knows instinctively, having flown from the womb with innate artistic ability that she did not inherit from the owner of said womb. She said that it offers lessons that fill in some of the gaps, explaining why and how best to do what she inherently does.

Thoughts for the artistically disinclined:

Parents who can’t even draw stick figures, rest easy. You don’t need to know anything (except how to drive so you can get to the store and buy art supplies). The book is written for the student. The time is the student’s. You don’t need to do or know anything.

That said, it’s a whole lot more fun if you do the program with your children.

Regarding the necessary supplies, we had everything on hand. We are an art family, however, so that may not be the norm for everyone. Still, there’s nothing you have to send a rover to Mars for.

ARTistic Pursuits Inc.--High School Art Curriculum Review
{Emily’s study of space was this lighthouse we visited.}

Thoughts for…well…anyone:

A daughter’s opinion: One of my daughters said, “I like that the student samples are not perfect. It makes me feel like, hey, I can do that. I can even do better than that!”

A teaching mama’s opinion: I really like that the program is teaching them to draw realistically. Other programs we’ve tried taught shape and color and lines, and the end result was fun, whimsical, and fake. That’s great, too but I have always wanted to be able to draw, say, a turtle, and have someone say, “Wow! Look at that turtle!” or even just, “It’s a turtle,” instead of “Nice rock. Why’s it green?”

I also like the attention paid to the masters. There’s a reason they’re the masters, and it’s not the whole cutting off the ear thing.

ARTistic Pursuits Inc.--High School Art Curriculum Review
{Emily’s still-life…and also her lunch.}

Thoughts on the timing: My children have found the two-projects a week time frame to be unrealistic for them. I would estimate they spend between two and four hours on each of their drawings. (Now, mind you, I have those children who, at the end of a Sunday school or vacation Bible school session are still there working on their art projects…forever!) They would prefer to spend the week on one assignment instead of two, so they can really work on it without it taking up as much of their time as it does with two sessions per week.

On the other hand, two of Marissa’s art mentors encouraged her to “speed up” the process, and do a little more free sketching with less perfectionism. The two-projects-a-week pace might encourage more decisiveness and less perfectionism with the “twins.”

Elisabeth ran out of time to finish this sketch of her brother.
{Elisabeth ran out of time to finish this sketch of her brother.}

Musings on the approach: This is a different approach to art than some of the other programs we’ve tried. It’s less how-to and more integrative. What does integrative mean, really? In this case, it means you develop certain skills which you then apply to art. You’re not going to walk away from these lessons knowing how to draw a sleeping cat and nothing else. One of my daughters enjoys this; the other just wants the how-to.

If you want realistic drawing lessons with history and analysis tied in, this is a great curriculum. Plus, ARTistic Pursuits Inc. has a line from preschool through high school/adult, so if it works for you, you’re set! I love being set.

Additional thoughts for my fellow roadschoolers:

If you want to do art on the road, you have to be totally committed, because it potentially takes up a lot of space. Space, as you know, is prime real estate in the RVing world. So if you really want your kids to learn to see and draw some of the places you are exploring and people you are meeting (which I highly encourage), and you want to commit to it, take note of this:

The tools you need for this curriculum are not ridiculously extravagant. With the exception of the sketch pad, you could keep everything else in a pencil pouch that you can hook right into a binder or stuff under a pillow–don’t your kids stuff art supplies under their pillows? The sketch pads and the book itself will be your space hogs.

ARTistic Pursuits Inc.--High School Art Curriculum Review
{Emily’s self-portrait of a younger her.}

And of course, the book has lay-flat plastic comb binding, which is ideal for the curriculum. Still, comb binding and trailer living are not friends. Someone inevitably leaves the book on the floor of the van and it gets stepped on or the cat knocks it off the bureau (dresser for those of you born in this century) or it gets crammed unceremoniously into the too-small-for-homeschoolers cupboard–in other words, trailer living is abusive to books. That said, this has held up very well so far.

If you do this program, you have to bite the bullet and buy each artist a sketch pad. This will prevent the attack of the paper monster, because everything will be neatly enclosed in a sketch pad. Ah, neatness–how I love thee!

Do I recommend this program for roadschoolers–absolutely yes, if you are committed to getting the supplies. It can really add to your children’s journals of their travels. It’s worth the space.

ARTistic Pursuits--High School Art Curriculum Review
{Elisabeth’s preliminary sketch of a hike we took in Sonoma, Arizona. When it’s finished, this will be a great reminder of our family fun there!}

Click here or on the banner below to read reviews from other homeschoolers:

CREW REVIEW IMAGE

Crew Disclaimer


Simple {Nearly} Messless S’mores

Simple {Nearly} Messless S'mores -- Only two ingredients and a mind-blowing technique!


S’mores are fun, but let’s face it. They’re messy!

Here’s a simpler version that won’t get quite as many stains on the shirts and goo in the hair.

Ingredients:

Simple {Nearly} Messless S'mores -- Only two ingredients and a mind-blowing technique!

  • Cookies with a hole in the middle and chocolate on at least one side. From here on out they will be referred to as “striped dainties,” because that’s what we called them when we were small and couldn’t read the boring name on the package.
  • Jet-Puffed marshmallows. This is not the time to be skimpy and buy the cheaper varieties. They are not as good! We’re talking s’mores here, people! Step up to the plate!
  • A stick or poker that will fit through the cookie hole. The double mallow roasters won’t work here, nor will the self-rotating triple or quadruple mallow contraptions.

Simple {Nearly} Messless S'mores -- Only two ingredients and a mind-blowing technique!

Directions:

1. Select the cookie that calls your name and “thread” the stick through the center hole with the chocolate-covered side facing away from you. This cookie is covered in chocolate on both sides, so use your imagination.

Simple {Nearly} Messless S'mores -- Only two ingredients and a mind-blowing technique!

2. Run the cookie down toward the handle of your roasting stick.

Simple {Nearly} Messless S'mores -- Only two ingredients and a mind-blowing technique!

3. Find just the right marshmallow…not too sticky, not too firm.

Simple {Nearly} Messless S'mores -- Only two ingredients and a mind-blowing technique!

Oops.

Simple {Nearly} Messless S'mores -- Only two ingredients and a mind-blowing technique!

Find just the right marshmallow again and spear it with the stick.

Simple {Nearly} Messless S'mores -- Only two ingredients and a mind-blowing technique!

4. Roast that marshmallow to perfection.

Simple {Nearly} Messless S'mores -- Only two ingredients and a mind-blowing technique!

5. Now it’s time for the removal and sandwiching. I like to combine this step into one smooth move, while my husband prefers to defy gravity with his impeccable balance skills.

If I were doing this, I would at this point place my second striped dainty on the stick with the chocolate side facing the mallow, and then proceed as my man indicates.

Move the striped dainty from the bottom of the stick toward the marshmallow, and slowly push it and the mallow off the end of the stick. Ignore the dog in the background saying, “Drop it, drop it, drop it.”

Simple {Nearly} Messless S'mores -- Only two ingredients and a mind-blowing technique!

Simple {Nearly} Messless S'mores -- Only two ingredients and a mind-blowing technique!

Perfect!

Simple {Nearly} Messless S'mores -- Only two ingredients and a mind-blowing technique!

6. If you haven’t already, sandwich that baby!

Simple {Nearly} Messless S'mores -- Only two ingredients and a mind-blowing technique!

Done…almost.

Simple {Nearly} Messless S'mores -- Only two ingredients and a mind-blowing technique!

There’s this one last step:

7. Eat it!

Simple {Nearly} Messless S'mores -- Only two ingredients and a mind-blowing technique!

Simple {Nearly} Messless S'mores -- Only two ingredients and a mind-blowing technique!

Simple {Nearly} Messless S'mores -- Only two ingredients and a mind-blowing technique!

Simple {Nearly} Messless S'mores -- Only two ingredients and a mind-blowing technique!

You can also eat them open-faced.

Simple {Nearly} Messless S'mores -- Only two ingredients and a mind-blowing technique!

Take s’mores to another level with other chocolate-covered cookies instead of grahams. Obviously, cookies without holes can’t be threaded onto the stick, so there’s more hand/mallow contact. I’m thinking that if you cared about hand/mallow contact, you probably wouldn’t be eating s’mores.

Simple {Nearly} Messless S'mores -- Only two ingredients and a mind-blowing technique!

Open up an Oreo and pop a mallow inside—licking the cream out first is optional. Or try mint cookies—it’s like a trip to the moon without the G-force.

Simple {Nearly} Messless S'mores -- Only two ingredients and a mind-blowing technique!

Why is this “better” than traditional s’mores?

  1. Scientifically, when compressed by the top element, the mallow has someplace to go besides oozing out the sides of the cracker sandwich. Some of it pushes up through the hole while some pushes toward the edges. This way, you have less sideways mallow displacement and better overall mallow coverage for a proper mallow/cookie/chocolate ratio in each bite.
  2. You have to buy and deal with one less ingredient.
  3. The chocolate melts every time.
  4. The chocolate does not drip out all over your daughter’s pale yellow shirt and stain it forever because you’re out of stain remover and the shirt somehow gets stuffed into the bottom of the sleeping bag and lost for three months.
  5. It’s a cookie. Cookies are good.
  6. They’re less messy…although admittedly not mess-free.
  7. It isn’t as intensely rich as a traditional s’more, believe it or not, so you can eat more. That might not be a good thing.
  8. Circles are fun.
  9. You can obtain complete cookie coverage with one mallow.
  10. Your s’mores world opens up to dozens if not hundreds of variations.
  11. It’s fun…more fun than a box of graham crackers.

Please note the unmelted chocolate, the mallowy face, and the massive sideways mallow displacement in the following pictures.

Simple {Nearly} Messless S'mores -- Only two ingredients and a mind-blowing technique!Simple {Nearly} Messless S'mores -- Only two ingredients and a mind-blowing technique!Simple {Nearly} Messless S'mores -- Only two ingredients and a mind-blowing technique!Simple {Nearly} Messless S'mores -- Only two ingredients and a mind-blowing technique!

Please note: This does not work with cauliflower.

Simple {Nearly} Messless S'mores -- Only two ingredients and a mind-blowing technique!

Special thanks to my s’mores team for enduring two nights of s’mores experimentation. I know it was a strain!

What’s your best s’more recipe or tip?


.

Trailer-Friendly Children’s Paint — Kwik Stix

You know what we received in the mail? This set of Kwik Stix 12 pk from The Pencil Grip, Inc., in exchange for this review. All opinions are my own…and my kids’…and our cat’s.

Yesterday I was taking a nap with my baby. My four-year-old was lying across my feet whailning. Whailning is a combination of wailing and whining. It’s pretty intense, and it’s pretty annoying. I know that as a mother I’m not supposed to say that my child is annoying me, but if whailning doesn’t annoy you, you must parent from a higher level of existence. The issue was bananas, but three seconds before it was something else and three seconds before that it was something entirely different.

I knew it wasn’t really bananas. She needed some direction. So I said to my four-year-old, “Do you want to paint?” and she said, “Yes!” and I said, “Go right ahead,” and I went back to sleep and she painted.

Those of you who have four-year-olds are wondering why (since this is my seventh four-year-old) I don’t have more parenting sense. (Others think I’m negligent for not joining in, but that is a parenting discussion for another day.)

Letting her paint alone–insane! You’re thinking I woke up to the entire travel trailer arrayed in pinks and purples, or the cat painted, or at the very least bowls of water and containers of paint spilled on the tables, cushions, and floor.

Not at all. I woke up to this:

Mess-Free Painting (Perfect for RVers and tired moms!)

Two sisters had been painting together–two sisters aged 7 and 4. Please take note of the mess. Here’s another angle:

Paints even the cat can't mess up!

There is a mess–there are crayons and colored pencils lying around, a couple stacking pegs, a bear face-planted into the table, a little felt vest they sewed, a wadded up tissue or something equally sinister. But there is no paint mess lying around. Even the cat can’t make a mess out of the project, and you know that cat would be redecorating the curtains if she could. Poor disappointed kitty.

(If you have a four-year-old artist and a curious cat and you’re sold on these paint sticks right now, they are available on Amazon (affiliate link).)

What Tuppence the cat is standing on is a set of Kwik Stix. Here’s a better view:

Kwik Stix The Pencil Grip, Inc. Review

They work like paint, only there is no brush, water, or extended drying period. No water! No water!

That’s my favorite part.

The colors are easily contained, easily stored, easily used…while Mama is napping. Hooray!

I really like the look of the projects my children made with the paints.

These are not markers–it’s tempura paint. You can change the look and feel of the picture by layering or adding pressure. While you won’t do a ton of blending due to the rapid dry time, you can do a bit. What takes this up another notch is the younger painters won’t end up with a big page of army brown with a hole in it. That’s the painting we all know and love from childhood, right?

Rebecca (7) likes the soft look, like in this valley scene that she matted and hung on the wall:

Mess-free painting for kids!

Elijah (10) is a little bolder and would rather rush through several projects. The tempura paint dries in only 90 seconds, so he can do that right in his sketchpad without our having to limit him based on available counter space or hanging space for drying. (Remember we live in a travel trailer–all 10 of us and two critters.)

This is his bold creepy clown (clowns creep us out):

Mess-free paint for kids--great for travel and sleepy moms!

Eliana (4) and Elisabeth (15) worked together. Ellie made a request, Elisabeth “Bean” painted it on one side of Ellie’s sketch pad, and Ellie copied her. I’m sure in the higher-trained educator circles, this process has a name, but I just call it Neat and Sweet.

Mess-free kids' paint--try it!

Here are some results of one of their Neat and Sweet sessions:

Mess-free paint and an art lesson idea.

Mess-free paint and how we used it.

Kid-friendly paint--No mess, no spills, just fun!

Notice the green one-legged blobster (blobby monster) showing through the picture on the left. That’s from coloring with marker on the other side. As of yet, we have not had a single incident of the Kwik Stix showing through on the other side. That’s a pretty big deal when you’re 4…or 43.

The Neat and Sweet duo also worked on a horse together. Bean drew the outside shape, and Ellie drew the same shape inside of the original, and so on until they had a horse. Actually, they had a cow, but a little mane-and-forelock action transformed it into the horse of another color you’ve heard tell of.

Trailer-friendly paint supplies for kids.

The kids also painted frames they had cut out of boxes. Wouldn’t that make a great Mother’s Day gift?!

Mess-free paint for kids!

For some reason I have yet to comprehend, every single time the kids use the Kwik Stix, they put them away! Covers on, sticks in the plastic holder, voila! Apparently, Kwik Stix come with a little bit of Mary Poppins magic or the box screams “Put me away!”

Kwik Stix The Pencil Grip, Inc. Review

These would make excellent gifts–end of school parties, birthday parties, Christmas stockings, Easter baskets. They would also be great to stock up on for classrooms, parties, daycares, or summer indoor fun. My kids love them.

You may wonder why the company is called The Pencil Grip, Inc., instead of Best Kids’ Paint Ever, Inc. They produce pencil grips, which are small finger positioners that slip onto pencils. The child or adult who has a really bad unique method of holding a pencil positions the fingers on the Pencil Grip and–bada bing bada boom–the hand is positioned properly. They even have a three-step trainer set.

This is not an issue we are currently struggling with, but we used them in the past for previous children (and me), and they work well.

Here’s where you can go to learn more about Pencil Grips.

Additional thoughts for my fellow roadschoolers:

Art runs deep in this family, as you can see by our second daughter’s art business, so we’ve tried to have ready supplies in the trailer for any time the art bug strikes, and for our Saturday art classes. Unfortunately, the paint wasn’t making the cut–too messy, bulky, time-consuming, space-consuming, and messy–that deserves to be mentioned twice. The kids were restricted to a little watercolor set you find in the craft and school supply aisles at Wal-Mart. Even that made me cringe with the bowl of water/cat combo.You understand if you live on wheels!

This is the solution.

We’re still keeping our watercolor set around so the kids can paint with brushes, but I no longer feel compelled to stock acrylics. What a relief!

Click here to learn what stationary schoolers have to say about Kwik Stix:

CREW REVIEW IMAGE
To find The Pencil Grip, Inc., online, go here…or here or here or…:
disclaimer_zps7f3b646c

Mostly Measurable, Manageable May Goals


Make Your Monthly Goals Manageable -- Join in here!

How did you do on your goals last month?

We were doing great, but then we were sidelined by the flu. We still managed to get our pie made and had a great Filipino feast for Emily’s birthday, so March was a good month. March! Then came April, and we were still flu-ish, so I skipped my goals. Ahem. Let’s just move on and not address my lack of motivation last month.

May.

Remember the ridiculously obvious rules for our mostly measurable, manageable monthly goals:

  1. They should be mostly measurable.
  2. It’s manageable.
  3. It’s a monthly goal.

You have to write your own goals, but here are my mostly measurable manageable monthly goals for May:

Family Habits

  • Breakfast Bible: finish Luke.
  • Monthly family manner: please and thank you. Sometimes we forget. Ahem.
  • Monthly family home care habit: the entry way…again. Progress is slow, but forward-moving. And now we have a pretty rug from my grandma–something pretty makes it easier to keep things clean, don’t you think?
  • Monthly character trait: practice finding the positives. You can never get too much practice!
  • Prayer: meal-time prayers have slipped by the wayside.

Family Fun

  • Have one game night focused on the older group.
  • Have one game night focused on the younger group.
  • Celebrate National Apple Pie Day on May 13. It’s still the year of the pie, after all.
  • Watch Princess Bride and eat Inigo Montoya stew.

Homeschooling

  • I’m not setting any goals this month. It’s an odd month, and we’re just going to enjoy it and move forward as we can, apart from a few reviews. Sometimes life is like that.

Music Mission

  • Write June 2016 newsletter.
  • Continue 2016 thank you notes.
  • Update subscriber list.

Health

  • Walk 30 minutes 3 times per week.
  • Do Fit2Be 5×5 5 times per week.
  • Add cod liver oil back into our diets. Yummy.

Writing

  • Write contracted article for Pregnancy & Newborn Magazine.
  • Five-ish TSHM posts.

Personal

What are your goals for May?

The Best Day of Her Life

The Best Day of Her Life -- It's not what you think.


We stood clustered in a small group listening to the exuberant man with the dynamic voice and the red hair. He talked about wonderful days–being born, getting confirmed, graduating, getting married, having children–wonderful days. Then he–the man with the big voice and the even bigger faith–said this:

“This is the happiest day of your life. This is the day you have been waiting for. This is your best day ever.”

And as he spoke of joy and celebration, I tried and failed to hold back my tears. As he spoke of life, my Grandma slipped away from our feeble attempts to hold onto her a little bit longer.

On this, the happiest day ever, Grandma died.

Bob and Marie - old photo - Bob looks from side

As I summarized Grandma’s full, rich life in an obituary that wouldn’t use up her entire life insurance policy for the space it took up in the papers, and also that wouldn’t reduce her generous spirit and faithful journey to a bland recitation of dates and achievements, I thought about that “best day of her life.”

I could have (and maybe should have) written this:

“Marie was born and baptized, was taught about her Savior, lived her life as a fallen and forgiven believer who trusted in Christ, and, best of all, she died.”

Best of all, she died.

20150816_141543

I, on the other hand, didn’t die.

I’m right here, living. I’m here, sick with who-knows-or-cares-what, with four children sleeping in my room because the next room over is too far away. I’m here nursing and worrying over and trying not to breathe my sick-germs on a two-week-old baby who peed on me three times last night and threw up inside my nightshirt and I didn’t even bother to change. I’m here trying to deal with the needs of people who–quite honestly–seem unnecessarily needy right about now: you think you should eat today?

I’m here trying to heal hurts that won’t heal and sooth a pain that will be torn afresh at every reminder. I’m here helping family decide if 100-plus people should eat mashed potatoes or potato salad, calling strangers to share the news, plunking out potential funeral hymns on the piano, reducing Grandma’s life to dates and achievements for the paper, and–strangely–really missing my grandpa who died last year.

I’m here hurting for my mother and uncles who lost the woman who gave them life, hurting for my brothers who were too far away to hold a hand and hear Pastor talk about Grandma’s best day ever, hurting for my children who are so young and hurt so openly.

I’m here failing as a wife and mother because my thinking is clouded by pain, and that failure makes me want to crawl in that bed with Grandma and go with her–go to see Grandpa, go to see if heaven is paved with streets of gold or lined with Eden-like carpets of grass, go to taste the cookies there, go to see Jesus and not have to fail or hurt any more ever again.

My living doesn’t hold a candle to Grandma’s dying.

Marie Mikels and ggd

I’ve heard death described as a birth. Our Little Judah Eb was resistant to being born. Despite many, many days of nightly labor, he was eight days late. Even then, he was happy to not come out, even though he had “outgrown” his old life. I wonder if he was scared–all the pressure, the squeezing, the estimated 750 million people putting their faces to Mama’s belly and hollering “Come out now!”

But then there he was, his old life was gone and his new one was just begun, and there was Mama’s face, and there were Mama’s arms, and there were Mama’s eyes pooling over with love, and there was–whoa, what’s this?!–milk! It’s pretty good on the other side. What he had resisted became his best day thus far–I mean, milk! Hello!

20150804_153648

We resist death–our best day ever–but why?

Let’s look at what Grandma is probably doing right now. She was a relatively new widow who died one day before her 67th wedding anniversary. Living the last year without Grandpa was hard for her. She missed him something awful. She didn’t acknowledge her 66th anniversary, because he had just gone to heaven ahead of her, and she didn’t have the heart. Can you imagine the celebration they had this year?

Grandma and Grandpa Dancing

She’s reunited with her parents, her father who loved his little “Moonie” like a father should, her brother who was killed in action in World War II and whose death shook her hard even 70 years later, her mother and sister. She’s seeing cousins and friends and her mother’s seemingly infinite number of sisters who were always filled with joy and who would get together and laugh and laugh and laugh and then simultaneously sigh out loud as if that laugh was the best thing that ever happened to them–I can almost hear the great-great aunts laughing now. What a reunion! Can you imagine?

The beauty, the sounds, even the feel of the air and the ground must be new and amazing and indescribable. The food, the ethereal light, the graceful slipperiness of the water, the delicate scent of the flowers, and the soft coolness of the breeze–can you imagine?

And then Him. His face. His hands that were pierced for us, for Grandma to enjoy her best day ever–strong hands, yet gentle and forgiving as He reaches for a hug. His lips as he says, “Well done, Marie. Well done.” His eyes–the depth and kindness and knowing of those eyes. Can you even begin to imagine those eyes?

It’s Grandma’s best day ever, and it will last for eternity. Can you imagine? I can’t.

Grandma1

This is only Grandma’s best day ever because of her faith in Christ. There was nothing she did to earn heaven–goodness knows Grandma had her fair share of flaws. Despite how wonderful Grandma was, she wasn’t “good enough” for heaven’s standards and never would be if she lived Adam’s 900+ years. People like Grandma and me–we’re not Christians because we’re better than everyone else; we’re Christians because we’re not good enough and we couldn’t possibly earn a best day ever on our own.

This beautiful artwork refelcts a beautiful soul--my grandmother. It was created by my 17-year-old daughter.

It is all Jesus–He took Grandma’s punishment and gave her salvation; all she did was trust Him and “it was credited to her as righteousness.”  I heard someone say, “If you don’t have faith in Jesus, you’d better live it up now, because this is as good as it’s going to get.” As harsh as that sounds, it’s true. No Jesus–no best day ever when you die. Period.

But the rest of the story is that the gift of the best day ever is free. You can have an eternity like Grandma’s. Jesus (God) did all the work for you. Just trust Him. (Learn more by reading John or Romans or ask me.)

Grandma (and Grandpa), I miss you. You both were and are such a crucial part of my life. Someday, on my best and happiest day ever, we’ll be together again–you and me and the laughing aunts and Him with those eyes.

Originally posted here on August 24, 2015. Reposted today in honor of Grandma’s birthday.

PORTRAIT BY MARISSA RENÉE (17 at time of drawing, currently accepting commissions)

10 Tips for Cleaning With Vinegar

10 Funky Tips for Cleaning with Vinegar -- save time, avoid chemicals

If you haven’t discovered the amazing cleaning power of vinegar, you haven’t lived.  Okay, you may have lived just a little bit, but chances are you are spending too much money on cleansers.

Cleaning with vinegar is cheap, simple, non-toxic, and, uh, aromatic. There is little that cannot be tackled by this powerhouse in the cleansing world, from stains and build-up to daily clean-up.  Tuck these tips into your mental filing system (or bookmark this page if your mental filing system resembles mine) for the many everyday messes that life throws at you.

Tips for Cleaning with Vinegar

Clean windows and mirrors with a mixture of one part vinegar to three parts water in a clean spray bottle.  (I get my spray bottles from garden centers because they’re usually prettier, and I like pretty things.  I’m a girl!) Spray, dry, repeat if necessary.  It may require a few cleanings before the residue from your regular cleaner is completely removed. Warn the birds!

Shine counters and appliance fronts with the window spray above, or add half a cup of vinegar to a sink of hot water, dip your washcloth and wipe.  (Do not use on marble!)  For that oh-so-perfect shine, dry well.

Clean the interior of a microwave by soaking a towel in half vinegar and half water.  Place it in the microwave and run it for a minute or two.  The towel will be hot, but when it cools a bit, use it to wipe up the now-loosened and non-smelly particles from the sides of the microwave.  Yup, it gets pretty nasty in there.

Make an abrasive scrub by mixing 1/4 cup of salt with a teaspoon of vinegar, applying to the area, and wiping clean.  Do not use on surfaces that cannot tolerate a little abuse.  If you have children, I recommend you not own surfaces that cannot tolerate a little abuse.

Remove stains, sticker residue, calcium deposits, and those questionables left behind by your children by soaking paper towels with vinegar and covering the area overnight.  If the object is small enough, such as a penny or other tarnished metal, soak the object in a container of vinegar.  A ready supply of shiny pennies will make you very popular with the littles.

Clean smelly drains and garbage disposals and simultaneously entertain the children by pouring 1/4 cup or so of baking soda down the drain and following that with 1/2 cup or so of vinegar.  When the fizzing subsides and the audience disperses, rinse with hot water.

Clean the dishwasher and remove hard water build-up by pouring a cup of vinegar into the dishwasher, paying close attention to the “water squirters.” Run a cycle.  You can also use vinegar instead of rinse aid for shiny dishes.

Clean a coffee maker by running a cycle with vinegar instead of water.  Unless you want flavored coffee the next day, run a few cycles with just water before adding grounds.

Disinfect a wet mattress (oops!) by spritzing with vinegar and sprinkling with baking soda.

Clean extremely dirty, unsanitary, or grease-stained surfaces with full strength vinegar.  Admit it—we all have such surfaces from time to time!

As long as the surface can handle the acidic nature of vinegar, give this affordable all-purpose cleaner a try for all your messes.  Naturally, before using vinegar on carpets or other fabric, you will want to test it in that discreet location we’re all supposed to have for testing carpet cleaners.

Don’t worry about the aroma from cleaning with vinegar.  It will dissipate as the vinegar dries.

For an amazing list of even more ways to clean with vinegar, visit Vinegartips.com.


How do you use vinegar in your home?