How to Make (amazing) Garlic Butter

How to Make Amazing Garlic Butter | TheSimpleHomemaker.com

This garlic butter is amazing. It’s amazing! It’s so amazing that when I make it and sit down to dinner with my family, I can’t stop talking about it. I can’t stop saying in my amazed voice, “This is amazing!”

And they can’t stop saying in their sarcastic voices, “Wow, you’re humble.”

And that’s why, at The Simple Home, we call this “Mommy’s Humble Garlic Butter.” You, however, may simply call it Amazing Garlic Butter.

The original version can be found at AllRecipes.com. The recipes are both very tweakable, so do what you like to make it work for your family, cuz that’s what cooking for the family is all about, isn’t it?

How to Make Garlic Butter

How to Make Amazing Garlic Butter | TheSimpleHomemaker.com

Ingredients:

  • 1 stick butter, softened
  • 5-ish shakes paprika
  • 2-6 cloves minced fresh garlic
  • 1/2 teaspoon salt
  • 1 teaspoon Italian seasoning

Optional ingredients:

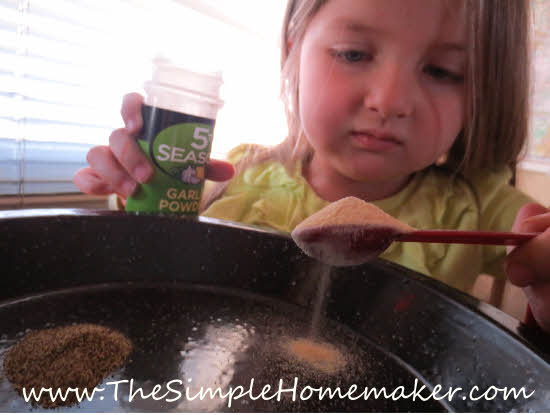
  • 2 teaspoons garlic powder (intensify the garlic flavor with garlic powder, or replace the fresh garlic entirely)
  • 1/4 cup parmesan cheese (we like it with or without)

Directions:

1. Make sure your butter is nice and soft.

How to Make Amazing Garlic Butter | TheSimpleHomemaker.com

2. Add 4-6 shakes of paprika, or more for a deeper orange color. (If you’re four, you may wish to go with four, because four is fun.)

How to Make Amazing Garlic Butter | TheSimpleHomemaker.com

3. Add as much fresh minced garlic as you like, 1-2 cloves for a light garlic flavor, 6 for a stronger flavor. We used 6 in this batch. (See notes for more info on garlic.)

How to Make Amazing Garlic Butter | TheSimpleHomemaker.com

4. Add 1/2 teaspoon of salt. I like salt, and because I eat pretty much everything from scratch, it isn’t hiding in many of my foods. That’s why I don’t have an issue with a heaping half teaspoon. Adjust to your needs and tastes, but remember that salted butter varies in its salt content, so start low and add more if needed.

How to Make Amazing Garlic Butter | TheSimpleHomemaker.com

5. Add a teaspoon of the Italian seasoning of your choice. We usually use homemade, but for this batch we used these gorgeous Penzey’s Italian herbs gifted to us from a friend we met on our travels.

How to Make Amazing Garlic Butter | TheSimpleHomemaker.com

6. Mix with a spoon (or I suppose you could use some form of technology if you are desperate to wash something).

How to Make Amazing Garlic Butter | TheSimpleHomemaker.com

7. Taste. Adjust to your desired level of amazingness.

How to Make Amazing Garlic Butter | TheSimpleHomemaker.com

8. Serve. (See ideas below.)

How to Make Amazing Garlic Butter | TheSimpleHomemaker.com

Store your humbly amazing garlic butter in the refrigerator and use within a couple of days if you are using fresh garlic. If you are using garlic powder, store where you normally keep your butter.

Serving Ideas:

  • Spread it on warm fresh bread or biscuits and serve immediately.
  • Spread it on bread, wrap the bread in foil, and return it to the oven. Oh my! (Yeah, I know foil will kill you, but who really cares. I mean, this is amazing! I just drooled on my keyboard. Not joking.)
  • Saute mushrooms and onions in garlic butter for an easy side.
  • Use it to scramble eggs, fry eggs, or flavor cooked eggs. (It’s great for these flower or shamrock eggs.)
  • Spread it on a toasted hamburger bun for a garlicky butter burger.
  • Add it to a grilled steak. I hear angels!
  • Melt it and add it to any vegetables. Do it. I triple dog dare ya.
  • Spruce up a boring side dish of plain noodles, rice, quinoa, or other grains.
  • Adorn baked potatoes or use it to flavor mashed taters.
  • Melt it and pour it over popcorn. Oh yeah!
  • Stick it in a bowl, set it on the supper table, and watch what happens.
  • It’s so versatile, you could even wear it. Okay, maybe not.

How to Make Amazing Garlic Butter | TheSimpleHomemaker.com

Notes:

Adjust the garlic to your liking. We like garlic…I mean I personally seriously love garlic. Don’t stand right next to me. Garlic breath. Whew.

Test it with garlic powder instead of fresh garlic sometime to see how you prefer it. I like to tone down or replace the fresh garlic if I’m serving it raw, but if I’m using it to cook or on bread that’s going in the oven, I hit it hard with fresh garlic. Bam!

I almost always double this recipe, because it’s amazing. I may have mentioned that.

How to Make Amazing Garlic Butter | TheSimpleHomemaker.com

Here’s the boring printable version:

How to Make (amazing) Garlic Butter

Recipe Type: condiment
Author: Christy, The Simple Homemaker
Prep time:
Total time:
This delicious, quick, and simple garlic butter is versatile and amazing in any of its many uses.
Ingredients
  • 1 stick butter, softened
  • 5-ish shakes paprika
  • 2-6 cloves minced fresh garlic
  • 1/2 teaspoon salt
  • 1 teaspoon Italian seasoning
  • 2 teaspoons garlic powder (optional: intensify the garlic flavor with garlic powder, or replace the fresh garlic entirely)
  • 1/4 cup parmesan cheese (optional)
Instructions
  1. Measure.
  2. Combine by hand.
  3. Taste and adjust the garlic as desired, using either fresh or powdered garlic.
  4. Serve as a spread for bread and biscuits, as a flavor enhancer for sides, or on popcorn. Put on meat or use to cook eggs and veggies.
  5. Store in the refrigerator and use within a couple of days if you are using fresh garlic. If you are using garlic powder, store where you normally keep your butter.


Seriously, I think this is amazing…but I love butter, and I love garlic, so…there ya go.

That’s how to make garlic butter. Make it, eat it, let me know what you think!

Special thanks to my daughter Hannah of Horse Crazy Bookworm for many of the photographs, and to my  helpers, butter softness tester, and tasters. You are all that and more!


All-Purpose Seasoning Recipe for Chicken, Fish, Rice, Veggies, and Just About Anything Else

Sometimes I’m all about speed and efficiency in the kitchen. That’s why I like to mix up my own spice blends ahead of time. On a busy night, there’s nothing better than a handy spice mix that you can snag for just about anything. (You all know that when I say “there’s nothing better,” I’m not counting cookies and pie and salvation and family, right? Just so we’re on the same page.)

That’s why I love this all-purpose seasoning we’ve made for years and named Mama’s All-Purpose Seasoning for Chicken, Fish, Rice, Veggies, and Just About Anything Else, or Mama’s APSFCFRVAJAAE. Catchy, eh? Fine, let’s just call it APS. Happy? Good.

The Simple Homemaker's All-Purpose Seasoning Recipe for Chicken, Fish, Rice, Veggies, and Just About Anything Else

I use APS on my roasted chicken, baked fish, pan fried fish, pan-fried chicken, veggies, and plain rice or quinoa. I’ve used it with flour to make a breading. Sometimes I sprinkle it on baked taters or home fries. APS is versatile enough to be used with just about anything. The only thing I haven’t used it for yet is dessert, although it might be good on popcorn. Hmmmm.

The original recipe comes from AllRecipes.com. My version is simplified, because that’s what I do...just in case you haven’t noticed by now.

As with all recipes, adjust the seasonings to your tastes and totally make it your own.

All-Purpose Seasoning for Chicken, Fish, Rice, Veggies, and Just About Everything Else

Ingredients

  • 4 teaspoons salt (start at 2 and adjust up (or down) according to your tastes)
  • 1 teaspoon onion powder
  • a scant teaspoon pepper (adjust according to your peppery mood; sometimes I use 1/2)
  • 1 heaping huge teaspoon garlic powder (or 2)
  • 2 teaspoons paprika

Optional ingredients

  • 1/4 teaspoon cayenne pepper (adjust as desired)
  • 1/2 – 1 teaspoon thyme (I like to use this for roast meats and sometimes for other cooked dishes, but I leave it out when I make a big batch to have on hand for general sprinkling)

Instructions

1 – Measure.

The Simple Homemaker's All-Purpose Seasoning Recipe for Chicken, Fish, Rice, Veggies, and Just About Anything Else

2 – Mix.

The Simple Homemaker's All-Purpose Seasoning Recipe for Chicken, Fish, Rice, Veggies, and Just About Anything Else

3 – Taste and adjust to your liking.

The Simple Homemaker's All-Purpose Seasoning Recipe for Chicken, Fish, Rice, Veggies, and Just About Anything Else

4 – Store APS in an empty spice container or in a mason jar in your pantry.

Cooking with APS

What to do with it:

Sprinkle APS wherever you want…within reason. (I don’t think I’d like it on ice cream.) I usually put it on potatoes and meats before cooking, and grains and veggies after cooking…but that’s just me. My hubby sprinkles it on anything as a table seasoning, especially rice.

How much to use:

About 2-3 teaspoons seasons a roasted chicken before cooking. If you add the additional ingredients (cayenne and thyme) or use extra pepper, it will be closer to two. Otherwise, just sprinkle lightly as with any salt.

The Simple Homemaker's All-Purpose Seasoning Recipe for Chicken, Fish, Rice, Veggies, and Just About Anything Else

This chicken was thinly sliced, tossed in a pan with olive oil, and sprinkled lightly with APS–that’s it! It was fantastic. All the best pieces were eaten before I remembered my camera, but these leftovers don’t look too bad! I call dibs!

The Simple Homemaker's All-Purpose Seasoning Recipe for Chicken, Fish, Rice, Veggies, and Just About Anything Else

Notes and hints:

We make this in bulk so it’s on hand to sprinkle on my roast chicken or anything else we feel needs a little more flavor. The simplest way to make it in bulk is to change the teaspoons to tablespoons, or just do a little math and multiply by, say, 20. It’s good for the ol’ noggin. Don’t mix it up in bulk until you’ve tried the recipe and tweaked it to your liking.

Sometimes we add thyme, but not usually when we make it in bulk, because I don’t want it in the big container for sprinkling on already cooked food. I really like the thyme for potato dishes and roast chicken, but I leave it out when I’m in a thyme-less mood.

The Simple Homemaker's All-Purpose Seasoning Recipe for Chicken, Fish, Rice, Veggies, and Just About Anything Else

We like salt. Adjust the salt to your personal preferences. When you’re making it, start with half the amount of salt and adjust up (or down if you’re really a low-salter). Some salts (like our Redmond’s Real Salt) taste more or less salty than others (like the Morton’s sea salt my chef used this time), so keep that in mind when adding salt. You can always add more.

The Simple Homemaker's All-Purpose Seasoning Recipe for Chicken, Fish, Rice, Veggies, and Just About Anything Else

The same goes for the pepper, garlic, and cayenne. Go with your mood, or find something that works for your family. We tend to enjoy a little extra heap to our garlic, but I generally save the cayenne for my cajun spice mix.

The Simple Homemaker's All-Purpose Seasoning Recipe for Chicken, Fish, Rice, Veggies, and Just About Anything Else

Once you get it adjusted to your liking, write the recipe down on a piece of paper and attach it to the container you store it in, so you can easily replenish as needed.

Here’s the boring printable version:

All-Purpose Seasoning Recipe for Chicken, Fish, Rice, Veggies, and Just About Anything Else

Author: Christy, The Simple Homemaker
Prep time:
Total time:
An all-purpose seasoning for just about anything in your kitchen.
Ingredients
  • 4 teaspoons salt (start at 2 and adjust up (or down) according to your tastes)
  • 1 teaspoon onion powder
  • 1 scant teaspoon pepper (adjust according to your peppery mood; sometimes I use 1/2)
  • 1 heaping huge teaspoon garlic powder (or 2)
  • 2 teaspoons paprika
  • 1/4 teaspoon cayenne pepper – optional (adjust as desired)
  • 1/2 – 1 teaspoon thyme – optional (I like to use this for roast meats and sometimes for other dishes, but I leave it out when I make a big batch to have on hand for general sprinkling)
Instructions
  1. Measure, combine, and store in a spice container or mason jar in the pantry.
  2. Sprinkle on your food as desired, either before or after cooking. I like to sprinkle it on meat and potatoes before cooking, and grains and veggies after.
  3. Adjust the seasonings to your personal preferences. For example, start with half the salt and adjust up if you like food to be less salty.


So, I suppose, like my hubby, you’re wondering why this is better than Lawry’s (or any other brand of) season-all salt. Mine has a cooler acronym.


Let me know how you adjust APS to your family’s liking…and what you call your version!  I’d love to hear.


Homemade Salad Dressing Recipe – Italian Dressing

I haven’t purchased salad dressing in years. Why not? We make it ourselves.

Homemade salad dressing is the way to go, people! You can adjust the flavors to your liking, avoid any allergens or additives, control the sweetness, save money, and procrastinate just a little bit longer on that trip to the store. Best of all, it’s simple and delicious!

Homemade Salad Dressing Recipe - Italian Dressing | The Simple Homemaker

We have a variety of homemade salad dressing recipes, including the classics, such as ranch, Caesar, and French, and a few more creative options. Today’s salad dressing recipe is our quick go-to Italian dressing that we throw together as needed or to keep on hand for a quick lunch salad or dinner side.

To create this recipe, we took an existing recipe from Pampered Chef and altered it considerably over the years to fit our tastes and preferences. This recipe allows for numerous variations, so don’t be afraid to experiment to find what suits your family best.

Homemade Salad Dressing – Italian Dressing Recipe

Ingredients

Homemade Salad Dressing Recipe - Italian Dressing | The Simple Homemaker

  • 1/2 cup white wine vinegar
  • 1 cup extra virgin olive oil
  • *1 tsp basil
  • *1/4 tsp oregano (missing in the photo…and this batch)
  • *3-6 cloves minced garlic (may substitute 1/2-1 teaspoon garlic powder)
  • *1/2-1 tsp salt (start with less and add more if desired)
  • 1/2 tsp onion powder

*(You could replace all of these with 2-3 teaspoons of Italian seasoning, but because each Italian seasoning recipe varies, you can adjust the dressing more to your personal liking by using separate seasonings.)

Combine all the ingredients in a container and shake or stir to combine.

Notes and Tips:

We usually whip up and serve our Italian dressing in a Pampered Chef “Measure Mix and Pour” salad dressing container that I bought a decade ago. It’s so simple, a four-year-old can use it. See!

Homemade Salad Dressing Recipe - Italian Dressing | The Simple Homemaker

Amazon also has dressing mixers, such as this one, that look like they work in a similar manner. I also like the cruets that you fill, close, and shake, like this one.

Another option for shaking and serving is to toss all the ingredients in a wine vinegar bottle, shake it up, and serve it from the bottle. It’s the free option.

One of the perks to making your own salad dressing is eliminating unwanted ingredients, such as sugar. We don’t put sugar in our homemade dressing, but if you want to take the edge off the vinegar or sweeten the oil, add sugar or the sweetener of your choice in 1/4 teaspoon increments (less if using stevia) until it reaches your preferred sweetness. Taste as you go.

Homemade Salad Dressing Recipe - Italian Dressing | The Simple Homemaker

We like a 1:2 vinegar to oil ratio, but if you prefer less vinegar, experiment to find the ratio you like best. Sometimes I’m only in the mood for a 1:3 ratio, and use 1/3 cup vinegar. The same applies to the garlic…and all the other ingredients. Alter them to suit your tastes.

During cold and flu season, add extra garlic for a little immune blast! This batch had 6 cloves, but we normally use 4.

Homemade Salad Dressing Recipe - Italian Dressing | The Simple Homemaker

If the olive oil flavor is too strong for you, swap out half the extra virgin olive oil for another healthy oil, such as grapeseed oil (commonly available in most grocery stores) or avocado oil.

Shake before using, as the dressing will separate. Or find someone cute and little to shake or stir for you.

Homemade Salad Dressing Recipe - Italian Dressing | The Simple Homemaker

Store your dressing in the refrigerator and use it within a few days. I do not know the science behind this, but I generally don’t let it go past two weeks. If you have a small family or don’t eat salads often, cut the recipe in half or quarters if using fresh garlic.

Storing it in the frig will cause the oil to solidify, so plan ahead and set it out for thirty minutes, or run it under hot water for a couple minutes. Sometimes I cheat and leave it out, but you didn’t hear that from me.

Caution: fresh garlic stored in oil can result in botulism, so, regardless of what I do, store yours in the refrigerator and use within a few days if using fresh garlic. Still, vinegar is used as a preservative for garlic, so…there’s that. Use your common sense and don’t mix up enough to last an age unless you use garlic powder instead of fresh garlic.

Enjoy!

Homemade Salad Dressing Recipe - Italian Dressing | The Simple Homemaker

Here’s the printable version:

Italian Salad Dressing

Author: Christy, The Simple Homemaker
Prep time:
Total time:
Serves: 12
Ingredients
  • 1/2 cup white wine vinegar
  • 1 cup extra virgin olive oil
  • 1 tsp basil
  • 1/4 tsp oregano
  • 3-6 cloves minced garlic (may substitute 1/2-1 teaspoon garlic powder)
  • 1/2-1 tsp salt (start with less and add more if desired)
  • 1/2 tsp onion powder
Instructions
  1. Combine. Shake before serving.
  2. Store it in the refrigerator.
  3. If you need it sweeter, add the sweetener of your choice in 1/4 teaspoon increments, tasting between each.


What do you think? Simple, isn’t it? Do you make your own homemade salad dressing? If not, what’s stopping you?

Special thanks to my daughter Hannah of Horse-Crazy Bookworm for the photography, hair-styling, and food presentation, and thanks also to my little mixer and taster.  

Linked to Nomday Monday.

Disclosure: some of the links in this post are affiliate links. If you buy something from Amazon through my affiliate links, they give me some of their profits (ain’t that sweet!) and I buy olive oil and make more salad dressing. It’s all for a good cause.

4 Thoughts on Tragedy, Family, Focus, and Faith

I’m supposed to be writing about Brussels sprouts. Somehow, I can’t force myself to think about Brussels sprouts right now (although these particular sprouts were unusually delicious). Another school shooting took place last week. I’m sure you heard.

I wasn’t going to write about it, because it feels like capitalizing on tragedy. But somehow, I find myself here in the dark writing, a small child asleep on my lap.

4 Thoughts on Tragedy, Family, Focus, and Faith (www.TheSimpleHomemaker.com)

There are no words for situations like this, for the victims, for those left behind, for the shooter’s surviving parent. There is only pain.

With pain comes a backlash.

We’re hearing people scream for gun control and other people saying this would have played out differently if every law-abiding citizen had a gun. Celebrities are stepping forward with their wisdom, mystically garnered from years of pretending to be somebody they’re not. Soon, it will be overshadowed in the media by another tragedy, but the pain will remain.

Closer to home, we’re hearing people say to hug your children a little closer tonight, let your kids be kids, keep them happy because this could be your last moment together.

Then we’re hearing people going on with life as usual, sounding off about the dangers of French fries and non-organic apples, arguing over politics, global warming, educational methods, fill in the blank.

And finally, we’re hearing people trying to make sense of the senseless.

Pause. Big sigh.

Four things.

1–Our world is in pain. A school shooting is big, and it’s tragic. When the hallowed halls of a safe place are attacked, everything we think we knew (but never really did) about life in America is irreparably shaken.

The same reality strikes families every day everywhere on a quieter, but just as painful scale. Children are taken away from parents, ripped out of “safe” places every day through disease, accidents, family break-ups, and sometimes evil people.

Everywhere, every day, there is pain.

The way we all feel about our children right now–the way we linger a bit longer at their bedsides, touch their hair, put down the computer or magazine and make eye contact–we should feel that way, act that way every single moment of every single day.

The way we pray for others, love our husbands a little more, pick up the phone to call our mamas, and smile at total strangers, that should be a daily practice.

The pain will never go away, not ever. Shouldn’t our love be just as enduring, just as strong? Even stronger? Shouldn’t we be this way all the time?

We won’t, because we’re human, and because we need to eat and sleep and earn a living.

But we should.

4 Thoughts on Tragedy, Family, Focus, and Faith (www.TheSimpleHomemaker.com)

2–Love like they’ll be gone tomorrow, and train like they’re going to live forever.

What does that mean?

Your child may be taken from you tomorrow. Heck, today even.

Cherish. Every. Moment.

Even when your boy throws up on your laptop, cherish it–not the throwing up, and especially not the smell, but cherish the fact that you have your boy there so he can throw up on your laptop…and hopefully he can do other, more remarkable things later.

The Bible calls it being grateful in all circumstances.

But don’t cherish to the exclusion of your duties.

Your job is to cherish your child as if each moment is your last, but the other part of your job description is to train your child as if he will live forever.

Please, please, please do not use tragedies and what-ifs and guilt (or your child’s personality, but that’s another topic) as an excuse not to train your children. If for no other reason than to make your daughter- or son-in-law’s life a little (or a lot) more pleasant, train your kids!

If I knew my children would be taken from me tomorrow, of course I wouldn’t make them do their chores or eat their veggies today. We would not work on reading lessons or first-time obedience or sharing. Chances are, however, that my children will someday need to be disciplined enough to clean up after themselves, obey those in authority, and be accountable for their own actions. That won’t happen without work…my work.

Don’t slack on the cherishing, and don’t slack on the training. I know there are only 24 hours in a day, but lucky for you, you can cherish and train at the same time.

4 Thoughts on Tragedy, Family, Focus, and Faith (www.TheSimpleHomemaker.com)

3-Assess your priorities. What are you passionate about right now? What is driving your days?

I’ll go first–my family, my God…and not in that order. But it wasn’t always that way.

If your passion suddenly feels unimportant in the wake of what happened, maybe that’s because, comparatively, it is.

Maybe your passion needs to be demoted to a hobby or a pastime, or maybe even kicked out for a time, so there’s room for your family and your God to take places one and two in your life (not in that order).

Spend 15 minutes on any social media platform today–Facebook, Twitter, anything. There is a huge outpouring of unified love and support and very real pain in America right now. And then there are the other posts:

“I can’t believe my mama gave my baby a graham cracker! I told her we don’t eat that junk and she did it anyway.” Well, I’m sorry, and she should listen, but you are so blessed to have a mama and a baby, and I bet you didn’t listen to your mama a whole lot more than she didn’t listen to you…just a guess.

“Anybody who feeds their children XYZ is just plain ignorant.” Maybe. Maybe. But I’m pretty sure the mamas that have no children to feed this morning aren’t comforted one iota by the fact that when they had children to feed a few days ago, they took the time and effort to feed them ABC instead of XYZ.

Has your passion or cause–whether real foods, green living, getting out of debt, or even a mission of helping others–skewed your vision just a little? Come on, just a little? Think about it, and hear yourself through others’ ears. Feed your kids right, be a green queen if that’s your calling, clip those coupons sister, but keep it in perspective, and never, ever, ever, ever let it take precedence over a living, breathing person…even us ignorant ones.

4 Thoughts on Tragedy, Family, Focus, and Faith (www.TheSimpleHomemaker.com)

4–Give them something real.

The empty words trying to make sense of this tragedy are just that–empty. Nauseatingly empty.

Give them Christ.

We teach our children what we understand from the Bible, and that’s this:

God commands all people to be perfect, not just good enough. Unfortunately, none of us is perfect…no, not even you. So God gave us the Christmas baby, His Son Jesus, who is both God and human. (Our brains can’t grasp this completely; we are, after all, only human.) Jesus lived the perfect life we couldn’t, and then died as punishment for our failings, not His own. Jesus came back to life (because He’s God, remember) and now lives in heaven and in my heart…and maybe yours, too. I hope so.

Believing that, however imperfectly we believe and however imperfectly we understand, is faith. Knowing Christ earned you a free pass to heaven, despite the doubts that sneak in, is trust. Living every day for Him instead of ourselves, however much we mess that up, is thankfulness.

If you believe that Christ is the path to heaven, share that with your children. Don’t wait for them to figure it out on their own.

It isn’t brainwashing for a doctor to give medicine to a dying child to save his life. It isn’t forcing our beliefs on a child to teach him how to read or spell or tell him about the history of America. If you believe in Christ, truly believe that He is the only way to heaven, why would you withhold that truth, that saving medicine, that “big picture” history lesson, that comfort and hope from your child? Why would you ever let it take a back seat to anything else?

You can share your faith while you’re training and cherishing–it all fits together beautifully.

If you don’t really know what I’m talking about, this path to heaven, please, please ask me.

share your faith

I’ve said enough.

I think maybe I can focus on Brussels sprouts now before my blessings wake up. You, my friend, go love on your children–cherish, train, prioritize, and share Christ. That’s the simple life in a nutshell.

Truth in the Tinsel – Hands-on Family Advent Fun

Three things before we begin:

  1. This is last year’s review of Truth in the Tinsel, before we got into it much. I’m reposting this, because we really liked it, and I share things I like with you…because I like you.
  2. This post contains affiliate links. In fact, I think all the links are affiliate links. Whoa. Intense.
  3. If you want to skip my review and just go check out Truth in the Tinsel, I won’t take you off my Christmas list. (That was an affiliate link. And so is this next one…and the next one….and…)

Check out Truth in the Tinsel here!

I love Advent. I love Advent wreathes and Advent calendars and Advent activities.

Unfortunately, many of the Advent activities I see are either too deep for my younger children or involve far too much preparation and work on the part of the parent. And I’m definitely not doling out chocolate or gifts every day in Advent. I mean, I’ll eat chocolate every day, but I’m not doling it out.

Last year I was tempted to try Truth in the Tinsel. I had heard quite a bit about it, and it sounded great for my hands-on kids. Still, with a brand new baby, a very sick child, and a music mission to launch, I wasn’t going to tackle anything more than I already had. Instead I opted to feed all seven children and my husband three meals a day for the entire month of December. [Insert applause here.]

Now this December is rolling around and the Advent tickle has struck again. This time I have a plan. The plan is to let someone else do all the planning and work. Are you with me?

So I bought Truth in the Tinsel, and I’m telling you people, I don’t spend money easily…except on food. I buy a lot of food…and I eat a lot of food…but not as much as I buy. I digress.

Here’s what I love about Truth in the Tinsel:

The 24 readings are straight from the Bible. I teach my children the Bible by reading directly from the Bible–how novel. Why not keep teach the Christmas story from the Source? Why not? (That wasn’t rhetorical.) There’s no reason why not! It draws from both the Old and New Testaments. Even more novel!

Each lesson includes an ornament craft which is totally doable. If you don’t have the time or energy for crafts, because of, you know, life, you can still implement the program. Truth in the Tinsel now offers a set of printable ornaments for $3.99. Set out a safety scissors, the crayons, maybe some glitter (shudder), and you’re set! Or skip the crafts. (It’s not illegal…seriously.)


If you don’t get to it every day, it’s okay. It’s okay. Hey, it’s okay! Okay? There are alternative schedules for making it work for your situation, even if that involves squeezing it in at random moments…which means I totally could have pulled this off last year after all. The goal is not completing the program; the goal is focusing your family toward Christ.


Although it’s designed for “little hands,” it can include the whole family. All ages can participate in the Bible readings, and anyone who is interested can get crafty at their own levels. Discussion questions can extend to everyone as well. My firstborn is learning to drive and my seventh-born is learning to walk, so at The Simple Home, including a broad age range is a huge deal.

Truth in the Tinsel is also available in Spanish and as a group study for churches, youth groups, homeschool groups, uh, insert your group here.

Truth in the Tinsel

Amanda, the creator of Truth in Tinsel, has a real heart for children’s ministry, and that radiates through her work.

Okay, enough from me. Visit the site, check out the sample page, and, see if it will add to your family’s advent celebration. You can download it instantly and begin using it right away.

Buy Truth in the Tinsel here.

Oh, here’s another idea! Check out Crock On – A Semi-Whole Foods Slow Cooker Cookbook, one of my favorite e-cookbooks. Let your crockpot do the cooking while you enjoy Truth in the Tinsel with your children! Brilliant!

Simple Thanksgiving Craft – How to Make a Canning Ring Pumpkin

I don’t normally post crafts on TSHM. It is too easy to become mired under a pile of wanna-do’s and feelings of inadequacy, and I don’t want to increase that by making you feel like you should do more…more…more. But…crafts are fun, and as long as you commit to not overdoing it, I will post the occasional simple, affordable, totally doable project. Cross your heart? Okay.

I saw this simple and charming mason jar ring pumpkin on Pinterest.

How to Make a Canning Ring Pumpkin via The Simple Homemaker

We have loads of mason jar rings just screaming to be a part of our Thanksgiving décor. I can respect that, so I popped through to the original post at Simply Klassic, where I learned two things: 1) Kristin, the original crafter is a terrific photographer and wonderfully creative, and 2) this craft is indeed simple, free, and quick.

My four-year-old ballerina and I threw this charming pumpkin together in 15 minutes Kristin did it in five), and everyone who has seen it has said, “Wow, where did you get that?”

My ballerina did most of the work while I made dinner, but because I tied the string, she refuses to let me say that she made it alone. She keeps a body honest.

How to Make a Canning Ring Pumpkin

Supplies:

  • 20-ish mason jar rings (I would go about 24. Ours could use 2-4 more)
  • small piece of string—a foot or so
  • cinnamon sticks or real sticks
  • burlap or other material or real leaves
  • one enthusiastic four-year-old ballerina, the cuter the better

Directions

String the rings on the string (it worked better when we put them all on in the same direction).

How to Make a Canning Ring Pumpkin via The Simple Homemaker

Tie the string tightly and cut away the excess.

Stick sticks (cinnamon or otherwise) in the center.

Cut out leaves and plop ‘em on top. (I drew them on the burlap for Rebecca.)

How to Make a Canning Ring Pumpkin via The Simple Homemaker

I called it complete at this point. If you want, however, Kristin says you can spraypaint the rings orange or white. I think it would be quaint to give them a weathered look with brown paint that you’ve either watered down or rubbed off immediately after painting it on. I need to use our rings to make yogurt in our Excalibur dehydrator, so we left them plain. (Plus paint equals more time and mess and less simplicity, and my ballerina was not interested in replacing her tutu with a paint shirt.)

That’s it!

Bask in the magnificence of it all. Name your pumpkin (Becca named ours Olivia Faith). Take pictures. Pin them, post them, send them to your mom (don’t forget to tell her you love her, and say “hi” from me).

How to Make a Canning Ring Pumpkin via The Simple Homemaker

If you make the canning ring pumpkin, send me a picture on Facebook!

Special thanks to Kristin at Simply Klassic for sharing this craft with us, and letting me share it with you. Go check out her end result using older, tarnished rings—very charming.

For more simple ideas, follow my Simple Thanksgiving board on Pinterest.

Truth in the Tinsel Advent Experience

Simple Bread Recipe

Update: I posted this simple and delicious bread recipe a year ago, and since then many happy people have written to tell me that it really is simple and delicious. I am reposting it for all my new followers…and for all of those who didn’t believe me the first time around when I said it was simple and delicious. You know who you are! 

Many of you have asked me for a simple bread recipe that doesn’t “take all day.” Ask and you shall receive!


A Very Simple Bread Recipe from The Simple Homemaker


We don’t buy bread.  Ever.

We make it all by hand.  We make sourdough bread for its health benefits, or grind wheat for a hearty whole grain loaf.  We make rolls, pitas, tortillas, flat breads, and hamburger buns.  One of the hands down favorite breads we make is, fortunately, also one of the simplest.  (While it is not the healthiest bread we make, it far surpasses most grocery store breads for its simple lack of “stuff.”) In fact, this simple bread recipe is the first yeast bread recipe my children follow to make bread by themselves.

Simple Bread Recipe

Ingredients

  • 2 cups warm water, not hot or you will kill your yeasty friends
  • 2 teaspoons yeast—a packet contains 2.25 teaspoons–close enough.
  • 2 teaspoons salt
  • 5-ish cups flour, all-purpose is fine unless you wish to alter it for health reasons

Instructions

  1. Mix the yeast into the water.
  2. Combine the salt with two or three cups of flour.
  3. Add the flour/salt duo to the water, stirring…or enlisting younger arms to stir for you.
  4. Add more flour and continue to stir until the dough holds together and is not wet.
  5. Dump the dough onto a clean, floured surface and knead. (If you don’t know how to knead bread dough, just fake it. This is very forgiving bread.) Add more flour as needed, but don’t overdo it. A little sticky is fine—too dry is not so fine.
  6. Knead until it is as smooth as a baby’s bottom. If you have no baby’s bottom at hand to compare it to, give it the stretch test. Hold the dough up to the light and stretch a portion of it. If you can see light through it before it breaks, congrats! You’re finished. If not, give it a little more tender lovin’ care. We knead this dough about ten minutes. (Sometimes we cheat and knead less. We’ve yet to be ostracized for our occasional laissez-faire kneading attitude.)
  7. Shape the bread into two or three Italian-shaped loaves or several mini-loaves. Do this by pressing the dough flat and folding it into thirds, or by rolling it up. Put the ugly seamed side down and tuck under the ends. Place the loaves on a lightly greased pan. Optionally, shape two shorter loaves and place them in greased loaf pans for “bread-shaped bread.” Grease the top (I like butter), and cover with plastic wrap or a flour sack towel. Set in a warm place to rise—the oven is too warm for rising and will kill your yeast, but the top of the refrigerator is just fine.
  8. Let those babies rise until about doubled in size, or until you get tired of waiting, whichever comes first. We wait anywhere from 30 minutes on a hungry, summer’s day to an hour and a half on an oops-did-we-forget-about-the-bread day. Normally, 45 minutes should do it.
  9. Preheat the oven to 450 degrees Fahrenheit. (My girls bake at 450 degrees, and I bake at 425 because I like the little time cushion for when (not if) I get distracted and wander somewhere that I can’t hear the oven timer. I won’t tell you whose bread my husband likes better.) Preheat for 20 minutes if you have baking stones in your oven.
  10. Slash the top of the loaves several times diagonally for that authentic, fresh-from-a-French-bakery look. Put the dough in the oven. (If you want to use baking stones, slide the loaves off the pans and onto the stones.) Spritz the interior of the oven with water. (This is optional, but gives the out-of-the-pan loaf a more tender crust. Some people have had trouble with stones and a few oven doors cracking from spritzing a very hot oven with cold water, so you may opt for a heavy duty pan with a couple cups of water set on another rack in the oven. Or skip it. Honestly, I skip it. We’re going for simple here. Some of my girls spritz the loaf and the sides of the oven.) Set the timer for roughly 12 to 15 minutes, although it may take up to 20 minutes or more, depending on the size of your loaves and whether or not they are in pans.
  11. Because all ovens, pans, doughs, and bakers are different, use this reliable test to see if your bread is done. Traditionally, cooks tap the bread; if it sounds hollow, it’s done. It always sounds hollow to me when I’m hungry and smelling fresh bread. Therefore, I take an instant read thermometer and insert it into the ugliest part of the bread where nobody will notice a hole. If the temp reads 190 to 210, it’s done.
  12. Remove, cool briefly, slice, eat. Personally, I believe bread is a means of transporting butter to the mouth, so I say load on the butter!

Wasn’t that simple?  And it didn’t take all day.

Printable Version

Tips and Trouble Shooting

If you have a stand mixer or a hand-held mixer with dough hooks, feel free to knead your bread with the dough hook instead of by hand.  Give it from four to seven minutes, usually on speed two, although you should check your manufacturer’s guidelines.  Seriously, you need to check.  Don’t ask me why I know.

If you are a stickler, you may let this dough rise twice.  We do that sometimes, shaping it after the first rise.  Honestly, though, we follow this simple bread recipe when we want a fast and simple butter transporter.  If we wanted to putz around with exact kneading and double rises and the like, we’d make something healthier.

Some people like to brush the top of the loaves with egg whites, water, or another “browner” before baking.  I prefer to brush mine with butter as soon as it comes out of the oven.  (I know—the butter thing is a little out of control.)

If your bread turns out flat, you may have let it rise too long. Punch it down, reshape and do over…but this time pay attention.

If your dough is not rising, your yeast may be old. Also, your dough may not be warm enough, a common problem in the winter. If this is a repeated problem, switch to fast acting yeast.

Simple Italian Bread RecipeYou may feel like you are adding a lot of flour. We usually end up using six cups per loaf. You can always add more, but you can’t take it out, so don’t dump it all in at once.

This simple bread is perfect spread thickly with garlic butter (a recipe for another day) alongside a big ol’ sloppy slab of lasagna.  (We’ll save the healthy eating posts for another day, as well.)

One last thing: if you are afraid of making bread, relax.  My eight-year-old has been making bread independently (not including the baking) for about a year, and she uses this simple bread recipe.

Here’s the boring printable version.

Simple Bread Recipe

Author: Christy, The Simple Homemaker
Prep time:
Cook time:
Total time:
Serves: 8
Simple, easy, and delicious basic French bread.
Ingredients
  • 2 cups warm water, not hot or you will kill your yeasty friends
  • 2 teaspoons yeast—a packet contains 2.25 teaspoons–close enough.
  • 2 teaspoons salt
  • 5-7 cups flour, all-purpose is fine unless you wish to alter it for health reasons
Instructions
  1. Mix the yeast into the water.
  2. Combine the salt with three cups of flour.
  3. Add the flour/salt duo to the water, stirring.
  4. Add more flour and continue to stir until the dough holds together and is not wet.
  5. Dump the dough onto a clean, floured surface and knead. Add more flour as needed.
  6. Knead until smooth, about ten minutes by hand or four minutes by stand mixer.
  7. Shape the bread into two or three Italian-shaped loaves or several mini-loaves. Do this by pressing the dough flat and folding it into thirds, or by rolling it up. Put the ugly seamed side down and tuck under the ends. Place the loaves on a lightly greased pan. Optionally, shape two shorter loaves and place them in greased loaf pans for “bread-shaped bread.” Grease the top (I like butter), and cover with plastic wrap or a flour sack towel. Set in a warm place to rise.
  8. Let rise until about doubled in size, 30-60 mintues, depending on the temperature of the room.
  9. Preheat the oven to 450 degrees Fahrenheit. Preheat for 20 minutes if you have baking stones in your oven.
  10. Slash the top of the loaves several times diagonally for that authentic, fresh-from-a-French-bakery look. Put the dough in the oven. (If you want to use baking stones, slide the loaves off the pans and onto the stones.) Spritz the interior of the oven with water. (This is optional, but gives the out-of-the-pan loaf a more tender crust.) Set the timer for roughly 12 to 15 minutes, although it may take up to 20 minutes or more, depending on the size of your loaves and whether or not they are in pans.
  11. Because all ovens, pans, doughs, and bakers are different, use this reliable test to see if your bread is done. Traditionally, cooks tap the bread; if it sounds hollow, it’s done. A more reliable method is to insert an instant read thermometer into the bread. If the temp reads 190 to 210, it’s done.
  12. Remove, cool briefly, slice, eat. Personally, I believe bread is a means of transporting butter to the mouth, so I say load on the butter!


Bread was invented as a means of transporting butter to the mouth.

~The Simple Homemaker, raised on a farm in The Dairy State

This seems like an ideal time to share this link about the health benefits of butter.

So…go make bread, and let us know right here how this simple bread recipe turned out!