Brining Turkey – The Secret to a Juicy Bird

My husband Steve makes an amazing turkey.  Juicy, flavorful, beautiful, and with drippings that make the perfect gravy.

The secret is in the brine.

brine [noun]: water saturated or strongly impregnated with salt

Brining turkey can be as simple or complex as you wish it to be.  When we first began brining turkey, we used a somewhat involved recipe from Alton Brown’s Good Eats.  Over time, we realized that our results are just as wonderful with a far simpler version. Sorry, Mr. Brown–you’re smart, I’m simple, so I win. Somehow that made sense before I typed it.

Brining a Turkey via The Simple Homemaker

Print Recipe

Brining Turkey

Ingredients and supplies for brining turkey

  • 5-gallon bucket or other large container with a lid (available at Wal-Mart for $3)
  • turkey
  • 1 gallon vegetable stock (optional)*
  • water to cover
  • ice
  • 1 cup coarse kosher salt
  • 1/2 cup brown sugar (optional)

At the very least, you need ice water, salt, a container, and a bird.

Directions for brining turkey

  1. Combine the salt and sugar in the veggie stock and heat on the stove until everything is dissolved.  Cool and chill.
  2. Place the turkey in the turkey tub…the bucket.
  3. Add the stock and then if necessary, add cold water until it covers the turkey.  Place the lid on the turkey tub.
  4. If you do not have a snow bank to keep the tub in, make room in the refrigerator.  We never have that much room in the frig, so we add ice throughout the day and keep it in the coolest place possible.
  5. Brine for a minimum of six hours.  We like to brine for two days.  Whatever amount of time you can devote to brining will help your turkey “retain water” and make it juicier.
  6. Remove the turkey from the brine, rinse, and roast as usual.

* To make your own veggie stock for brining, bring a stockpot of water and veggies to a boil. Use either ends and leftovers you’ve frozen over time, or fresh veggies.  I like carrots, celery, and onion, but use whatever you have on hand.  Simmer for several hours (or as much time as you have).  Strain. Lately, I’ve been making my stocks in my Instant Pot (affiliate link) in half the time. Give me a woo and a hoo!

A note on veggie stock:

If you have guests with food issues, such as allergies, sensitivities, Celiac, or Crohn’s, please don’t use store-bought veggie stock. Many of them have ingredients in them that will make the turkey unsafe for your guest. Just use ice water or go through the ridiculously simple process of making your own stock.

A note on making gravy from the drippings:

I recently read that you may not want to brine your bird, because, while it will make the turkey more flavorful and juicy, you will have to pay attention to how much salt you put in the gravy or it may be too salty. Ahem. DUH!

If you brine your turkey and make gravy from the pan drippings, do not add salt to your gravy without first tasting it. Rinsing the bird before roasting helps reduce the salt in the drippings.

A note on other birds:
I use a simple brine on my roasted chickens as well, containing only water and salt.  My family can always tell when I skip that step.

Print Recipe

Enjoy your juicy turkey, and have a blessed Thanksgiving, remembering to Whom we owe our thanks.

What are your best turkey tips?

Homemade Cough Syrup Recipe

I am not a fan of over-the-counter cough syrups, and for good reason.  Nevertheless, there are times (like today) when the cacophony of hacks and sniffles demands a little extra attention, and children need relief from coughing so they can get their healing sleep.

Homemade Cough Syrup Recipes via The Simple Homemaker

Besides the usual rest, immune-builders, and liquids, homemade cough syrup can provide some relief.  Many of the old recipes contained whiskey.  I can see how that would knock the little ones out for a few hours.  This homemade cough syrup recipe which my great grandmother passed down to my mother is alcohol free.

Great Grandma’s Homemade Cough Syrup Recipe

Cough Syrup Ingredients

  • one cup honey, raw is best
  • one teaspoon ginger
  • juice of one lemon

Combine and simmer over very low heat for 15 minutes.  Do not overheat, as the raw honey will lose some of its remarkable nutritional and healing benefits.  This is also great for sore throats.  (If you don’t want to risk overheating, put the honey in after combining and heating the lemon juice and ginger.)

Thanks, Great Grandma!

I also found several homemade cough syrup recipes from bloggers around the web.  Here are my top four.

Top Four Homemade Cough Syrup Recipes

The following homemade cough remedies are organized in order of what is most readily available in my pantry.  Your pantry staples are probably slightly different than mine, so take a peek at each before deciding on one.

Keeper of the Home: Building on a simple base of raw honey and onion, Stephanie also offers options to enhance the homemade cough remedy with ingredients you may or may not have readily at hand.  The options make it suitable for most pantries.

Nourishing Joy: While not quite as simple as Great Grandma’s recipe, Kresha’s homemade cough syrup can easily and quickly be created from items I have readily on hand.  If you are an avid do-it-yourselfer in the kitchen, you’ll recognize all the ingredients.  Kresha also explains the health benefits of each component in her cough remedy. She also has a recipe for herbal cough crops.

Frugally Sustainable: Andrea’s homemade cough syrup uses fantastic ingredients, not all of which are in the average pantry.  She recommends planning ahead, preparing the herbal syrup in advance, and storing it in the refrigerator until the first signs of a cold sneak into your home.

Modern Alternative Mama: I only have three of the six ingredients in Kate’s elderberry and honey cough syrup recipe.  Nevertheless, by preparing ahead for the inevitability of the season, you could be stocked up and ready to concoct a batch of this powerhouse against colds.  Kate successfully uses this homemade cough remedy for her own family.

To further get through the season healthfully, check out the superb five-week immune-building recipe link-up sponsored by Erin at The Humbled Homemaker, Nikki at Christian Mommy BloggerMindy at The Purposed Heart, Anne at Quick and Easy, Cheap and Healthy, Leigh Ann at Intentional by Grace, and Rachel at Day2Day Joys.  The recipes we’ve tried are fantastic!

How do you fight colds at your house?

Healthy Snacks To Go

Simple Biscuit Recipes – Sleeping Baby Biscuits and Screaming Baby Biscuits

If you’re new to baking, biscuits are a great place to start.  They’re really hard to mess up.  We have two simple biscuit recipes and alternate between them depending on what life is throwing at us at the time.


The first biscuit recipe below is more involved than the second and requires two hands, so we dubbed it Sleeping Baby Biscuits.  Wait until the baby’s asleep before trying this biscuit recipe.  The second is easy to whip up with one hand in a matter of minutes.  You can mix these up while holding a screaming baby in one hand, so this simple biscuit recipe is aptly named Screaming Baby Biscuits.

When the baby is asleep, give this biscuit recipe a try:

Simple Biscuit Recipes – Sleeping Baby Biscuits

Author: Christy
Prep time:
Cook time:
Total time:
Serves: 6
Sleeping Baby Biscuits are biscuit perfection! Serve with butter and jam, or use for breakfast sandwiches, biscuits and gravy, or Egg in a Basket!
Ingredients
  • 2 cups flour (of your choice)
  • 3-4 teaspoons baking powder
  • 1/2 teaspoon salt
  • 1/2 teaspoon cream of tartar (if you don’t have it, skip it! It adds a little fluff to the biscuits, but so does the baking powder, so don’t worry about it.)
  • 1 tablespoon honey
  • 1/2 cup butter
  • 2/3 cup water or milk
Instructions
  1. Preheat oven to 450.
  2. Mix dry ingredients in one bowl.
  3. Cut in butter. (Cold butter cut into the flour using a pastry cutter or a back and forth motion with two table knives will lend a flaky texture to these biscuits. Seeing as we live in the real world, I often soften the butter and stir it in with a GASP wooden spoon.)
  4. Mix milk/water and honey in another bowl. (Okay, fine, I just dump them both in the flour/butter mixture…and I don’t actually measure my honey.) Add to dry ingredients.
  5. Mix until it holds together. Then dump it onto a lightly floured surface and knead about a dozen times.
  6. Flatten the dough gently and cut with a biscuit cutter or the top of a cup or glass into about 12 biscuits.
  7. If you like crusty edges, place the biscuits on a baking sheet about two inches apart. If you like softer edges from a “pull-apart” biscuit, put them close together in a pan. You may brush the tops with melted butter or milk, but again, real world!
  8. I like to let them rest for about twenty minutes before baking, but, seriously, my babies don’t sleep that long, so I usually just throw them in the oven. Bake at 450 for 10 minutes or until they are done to your liking.

If the baby is not cooperating, opt for this very simple biscuit recipe:

Simple Biscuit Recipes – Screaming Baby Biscuits

Author: Christy
Prep time:
Cook time:
Total time:
Serves: 6
This is an old family recipe from my mother that everyone makes differently, so play with it until you find what you like…but not if the baby’s screaming.
Ingredients
  • 2 cups flour (of your choice)
  • 1 teaspoon salt
  • 4 teaspoons baking powder
  • 1/3 cup oil (sometimes I use butter)
  • 2/3 cup milk or water
Instructions
  1. Preheat oven to 425.
  2. Mix dry ingredients in a bowl.
  3. Mix wet ingredients in another bowl. (I use a glass measuring cup to save on dishes.)
  4. Combine with your hands, a spoon, your child’s hands, whatever.
  5. Grab by handfuls and drop on a baking sheet. It makes around 12, depending on the size you like.
  6. Bake for 12-15 minutes.
  7. For a more pastry-like texture, use a 50/50 ratio of oil/butter to milk/water. Screaming Baby Biscuits are great left out over night uncovered for morning grazing. Serve with honey and butter.

The original version of the Sleeping Baby Biscuits recipe comes from a really old, tattered, yellowed Better Homes and Gardens cookbook my husband and I bought for a quarter at a garage sale nearly two decades ago.  The Screaming Baby Biscuits recipe is from my mom, who is not old, tattered, or yellowed, but who makes great biscuits.

Enjoy these simple biscuit recipes!


How To Make Ketchup

A reader recently asked how to make ketchup.  Great question!

Despite the fact that my two youngest like to dip pickles in ketchup, we don’t generally use a lot of it here.  Nevertheless, I was on a recent meatloaf and hamburger kick, so we went through quite a bit of the red gooey goodness.  In fact, we ran out often, and there was no way I was dragging myself to the store just for ketchup, so I made some.  It takes less time and effort for me to make ketchup than to go to the store and buy it.


There is another reason to make your own ketchup.
  If you read the back of a ketchup bottle, you will notice corn syrup in almost every brand.  Brands that do not have corn syrup have quite a bit of sugar.  And some have both!  We only buy ketchup without corn syrup, but that doesn’t negate the quantity of sugar.  I like to control the amount of sugar my family consumes…although I don’t think they necessarily like that aspect of me.

Here is how to make ketchup with our quick(ish) and simple homemade ketchup recipe, adapted from an overly sweet Allrecipes.com find.  Linda, this one’s for you!

How To Make Ketchup
Recipe Type: Condiment
Author: Christy, The Simple Homemaker
Prep time: 10 mins
Cook time: 1 hour
Total time: 1 hour 10 mins
This homemade ketchup recipe is an easy and healthier alternative to store-bought ketchup.
Ingredients
  • 6 ounces tomato paste
  • 1 tablespoon brown sugar (or rapidura, muscovado, or your sweetener of choice—I use a little less than 1 tablespoon)
  • 2 tablespoons white or apple cider vinegar (I’m an apple girl)
  • 1 teaspoon garlic powder
  • 1 teaspoon onion powder
  • 1/8 teaspoon allspice
  • 1 teaspoon salt
  • 2 teaspoons molasses (I sometimes use more—hey, it contains iron)
  • 1 cup water
Instructions
  1. Mix all the ingredients together in a small saucepan and simmer on the stove for up to an hour or until it reaches your desired thickness. Cool, and adjust seasonings and sweeteners to your taste. Makes about a cup of ketchup, depending on how thick you want it.

The issue I have with simmering for an hour is that I usually notice at the very last minute that there is no ketchup, you know, when I reach in the frig to grab and use the ketchup.  That means I don’t have time to simmer…so I sometimes don’t.  If I’m not going to simmer, I only add enough water to get it as thick as I want it.  Nevertheless, as much as I hate to admit it, it’s best to simmer so the flavors can mesh.

I double this recipe and store it in a pint-sized mason jar, but you could put it in an empty ketchup bottle.  (I say “I,” but my girls usually make this cool condiment.)

Lacto-Fermented Ketchup Recipe

A better approach is to plan ahead and make a healthier ketchup.  Gnowfglins, a fantastic site for painless education in wholesome food prep, has an excellent recipe for lacto-fermented ketchup.  This is a very simple method of adding healthy probiotics to your homemade condiment selection.  Once Upon A Plate has a slight variation of this same simple fermented ketchup recipe, and a bit of an explanation for extracting whey from yogurt.

These lacto-fermented ketchup recipes are my first choice for a healthy ketchup recipe.  Fermented ketchup is not difficult to make, and you don’t need special equipment, so don’t be intimidated by the term “lacto-fermented” or the two-day fermentation period.

One More Ketchup Recipe


If you have a hearty tomato harvest and want to go completely from scratch
, you can either make your own paste or try this ketchup recipe from Allrecipes.com.  Read the reviews first.  This is not a simple recipe, and has some strong flavors you may wish to adjust or leave out entirely according to your family’s preferences.

So there you go, Linda and friends!  Now you know how simple it is to make ketchup.  Thank you for sharing your questions.  Please submit any other questions you may have, and I’ll answer them as quickly as possible.

If you try this ketchup recipe, let us know how it goes! Come back and leave a comment and rate this recipe.

This post is linked up to:

Teach Me Tuesdays, Raising Homemakers’ Homemaking Link-up, Works For Me Wednesday, Real Food Wednesday, What’s Cooking Wednesday, Gluten-Free Wednesdays, Full Plate ThursdaySimple Lives ThursdayTurning The Table ThursdayPennywise PlatterThings I Love Thursday,  It’s a Keeper Thursday,  Frugal Food ThursdayFrugal FridayFood Trip Friday, Weekend Whatever

Simple Birthday Party Ideas

It’s birthday season at The Simple Home.  We have three birthdays lumped together at the beginning of autumn, another in November, and two more closing out the Thanksgiving and Christmas seasons, one of those landing on New Year’s Day.

Simple Birthday Party Ideas

It is possible to go absolutely nuts during birthday season.  I have seen what some non-celebrity parents do for their children’s birthdays.  I won’t give you my personal opinion, but my children think those families are nuts.

Every birthday we have is simple, affordable, and stress-free.

Here are some simple birthday party ideas to keep the festivities down to a dull roar while still making the birthday girl or birthday boy (or birthday mom!) feel special.

Simple Birthday Party Ideas

Size of the Guest List

Keep it small!  If you have an overly stimulated two-year-old surrounded by 25 other overly stimulated two-year-olds, you’re asking for it…and chances are you’re gonna get it.  You’ve been warned.

There is nothing wrong with a party for the immediate family only.  If you want to include Grandma and Grandpa and a few cousins, that’s great, but remember that with each person you include, you are adding stress and cost, plus obligating that person to spend money on a gift.

If you have a lot of children, consider throwing one annual birthday bash to which you invite the entire extended family and some friends.  When the real birthdays roll around, stick to just the household and maybe grandparents.

As your guest list grows, so do the number of presents your child will be tossing carelessly on the floor for you to trip over…I mean, the more gifts your child will be receiving. To avoid adding more clutter to your life and obligatory expense to the guests’ lives, include a note in the invitation that says “Your presence is our present; there is no need to bring gifts.” This also helps to not spoil your child, while still making him feel special.

Fun and Affordable Birthday Decorations

Simple Birthday Party Ideas - Decorating with BalloonsBalloons are cheap.  I’m not talking the fancy inflatable shiny character balloons; I mean a bag or two of balloons from a discount store (like Wal-Mart).  Personally, I don’t like balloons, probably because I almost always have someone at the “if there is a way to fit this in my mouth, I will find it” stage.  Therefore, we keep the balloons off the floor by tying them to a string and running the string of balloons across the ceiling a couple times.  It’s even more fun when the children decorate the balloons first to fit their themes.

Crepe paper is also cheap at discount stores.  Decorate the birthday girl’s chair before she wakes up, or write her name on the wall in crepe paper. Simple Birthday Party Decorating Ideas

A white plastic tablecloth sells for a buck or two in the party supply section of—you guessed it—discount stores.  Children can decorate it using permanent markers—for creative children, this is often more fun than the gift opening.

Plain white paper for wrapping gifts can also be decorated. Other great sources of wrapping paper are Sunday funnies, brown paper bags, or rolls of newsprint paper or butcher paper.  All can be decorated, although the funnies are fun as-is. Bows can be tied with yarn, or you can stock up on wrapping ribbon around December 26.  Sewing departments usually sell thin ribbon very cheaply, and it doubles beautifully as hair ribbons for little girls.

Make a birthday banner consisting of all the letters in the child’s name, the letters in “Happy Birthday”,” or pictures from birthdays past.  You could also have siblings or the birthday girl herself make signs to decorate the house.  It will not look like Hallmark, but it will be charming and very, very special.Simple Birthday Party Hats

Decorate a birthday tree.  Laminate pictures from birthdays past and hang them on a small tree or houseplant.  Presents for the special someone can be placed under the tree.

Have all guests decorate their own birthday hats.  Optionally, you could have your own children decorate hats and party favor bags in advance of party day.

Easy Party Games

The decorating is often so much fun that the children do not need any other games.  If they do, however, remember that sometimes the simple, classic games are the best.

For the little ones, duck, duck, goose, bean bag toss, ping pong ball bounce, follow that leader, and other simple games fit the bill.  So does bringing out a bucket of Lincoln logs.  Whatever you do, don’t stress a roomful of 20 toddlers!

Older children might enjoy a scavenger hunt, treasure hunt, or charades.  Pinatas are also fun, but most sold in the store today are the (booooring, totally low-action, why-not-just-hand-out-a-bunch-of-candy) pull-string type.  Those are fine for the littles, but the older children, especially boys, really want to hit something.  So…make your own!

Have your birthday child decorate some poster board for a “pin the tail on the donkey” type of game, but change it up for the theme or your child’s interests.  Pin the petal on the flower, pin the light saber on Luke Skywalker, pin the facial features on the birthday boy (a drawing of the birthday boy, that is)—you get the idea. I know it’s very last decade in most parents’ minds, but it’s simple, affordable, and fun for the children.

Put an address label on each person’s head.  Each label has the name of a kind of animal.  By asking questions of others, each person has to guess what he is throughout the party.  Once you know what you are, remove the sticker. This is also a great mingling activity if your party gets a little large.

Birthday Party Food

Make the birthday boy his favorite meals.  If he requests steak and lobster, you may need to lower his expectations a bit and give him hamburgers and shrimp.  Otherwise, fill the day with his favorite foods.  Do as much as possible ahead of time.

If you have invited a crowd, think of foods that really stretch.  Hamburgers and hotdogs are low-key and go well with a big, inexpensive batch of filling baked beans.  Grill the meats up ahead of time and put them in roaster pans that can easily be reheated in the oven.  The beans can go in the crockpot.

Pizza is obviously the simplest choice for a large group, and a general crowd pleaser.  Supplement with a large lettuce salad and a fruit salad, or anything else that guests on restricted diets may require.Simple Birthday Party Ideas - Ice Cream Ball

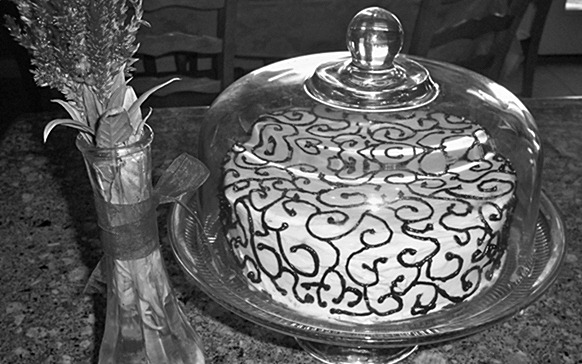
Cake and ice cream are always a hit.  Save a lot of money by making your own cake.  You can really stretch out the cake experience by having guests decorate their own cupcakes.

Consider a popcorn bar instead of sweets to keep costs and sugar down.

For a small group, have the ice cream be part of the action by making it right there, either in plastic bags inside other plastic bags filled with salt and ice, in an ice cream maker, or—the ultimate—in an ice cream ball.

If you are making it a “friends” party and want to keep the cost down, hold the festivities from around 2 to 4 p.m. and serve only cake and ice cream.

Please remember that a birthday party does not have to be stressful; nor does it have to be perfect.

If a child wants to help (or independently) decorate the cake or the house, let him!  The smile on his face is far more important than the impression your neighbors or relatives would formulate from seeing the near-perfect cake and home décor you would otherwise have put out.

It is not about perfection—it is about the special person you are celebrating.